Cobblestones
Under construction.
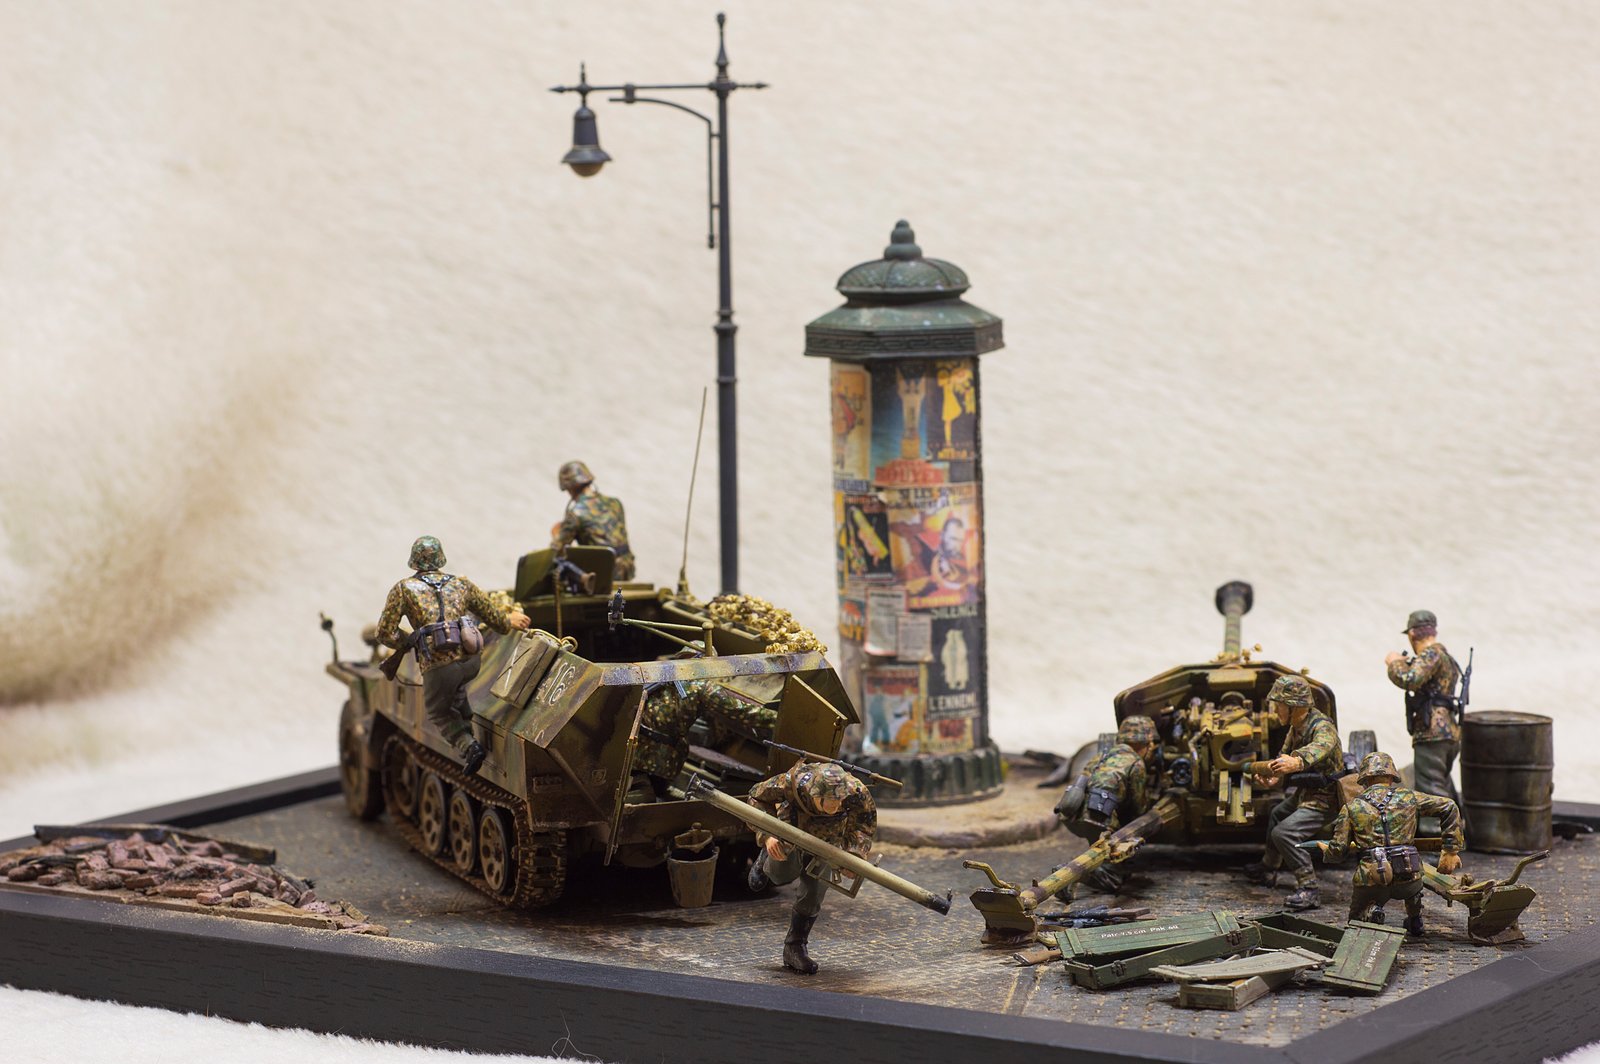
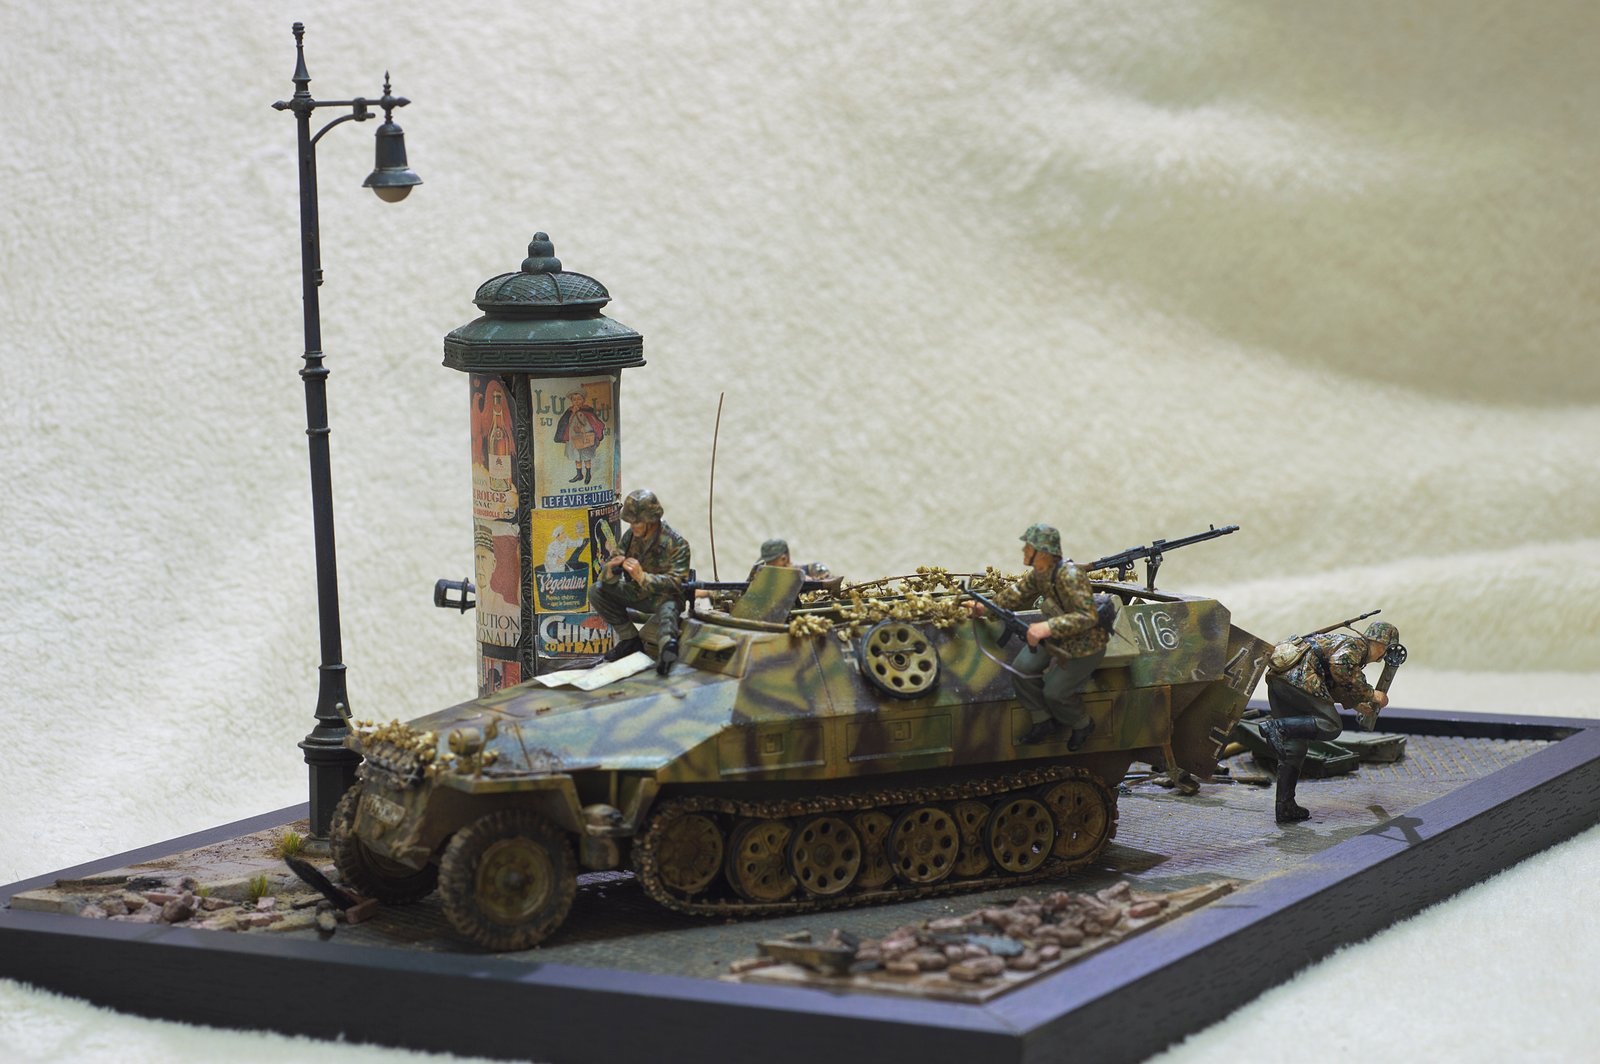
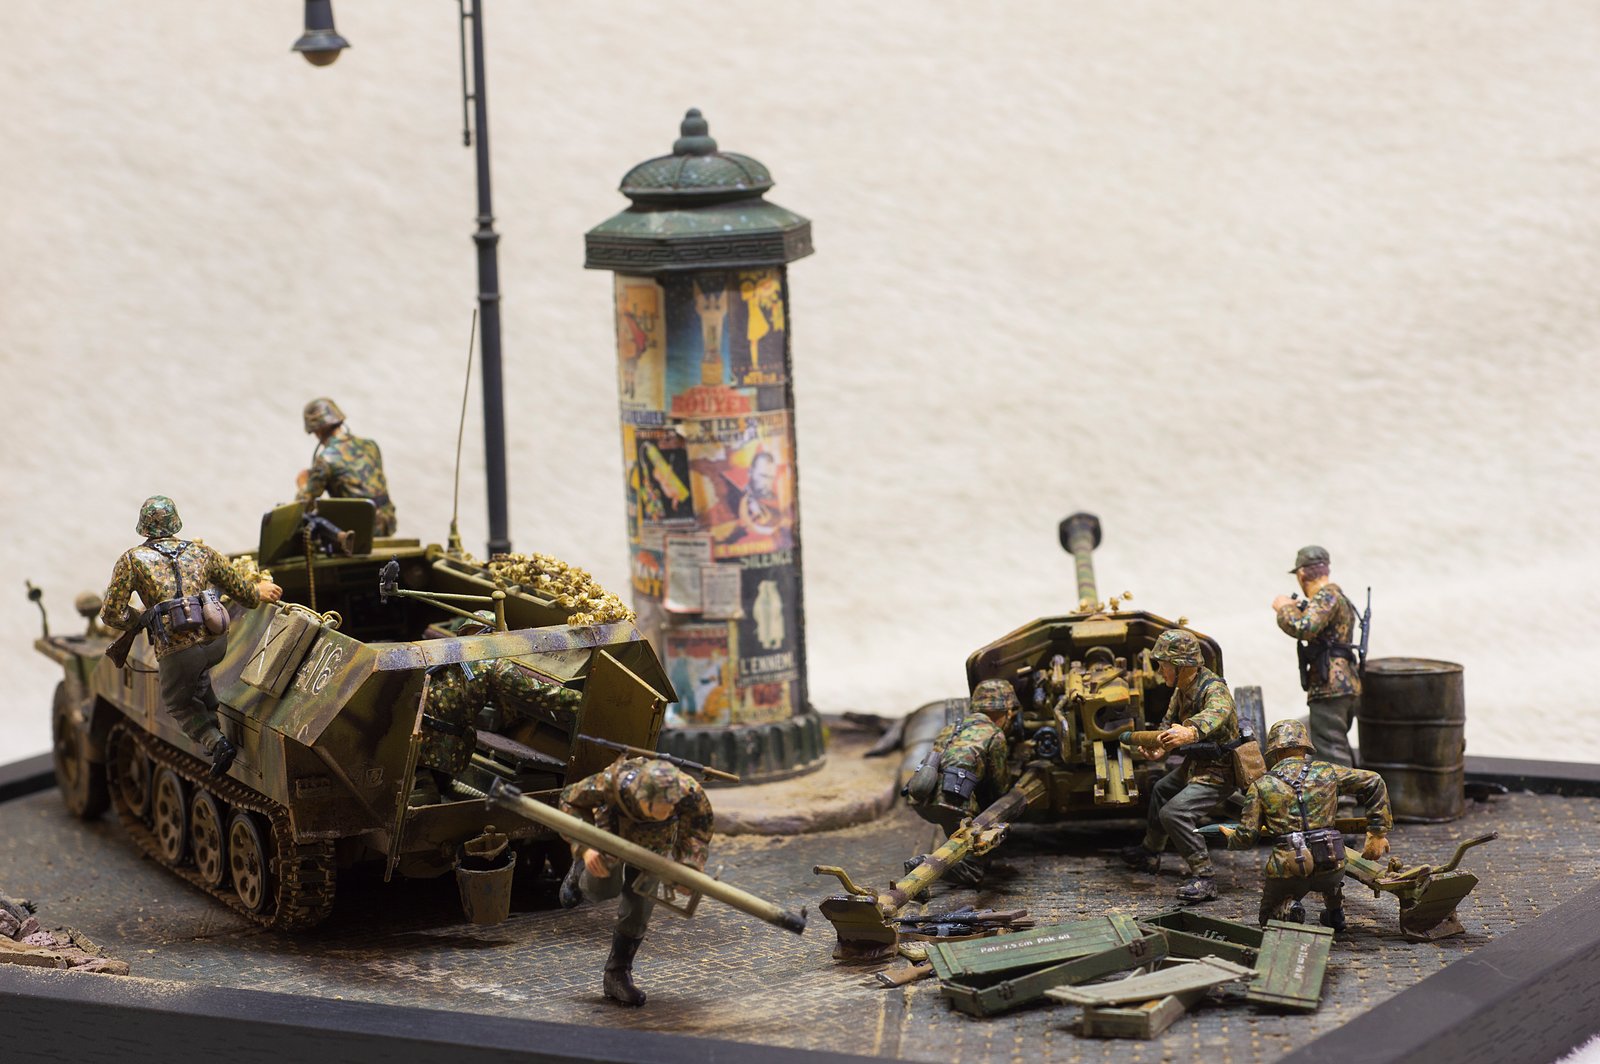
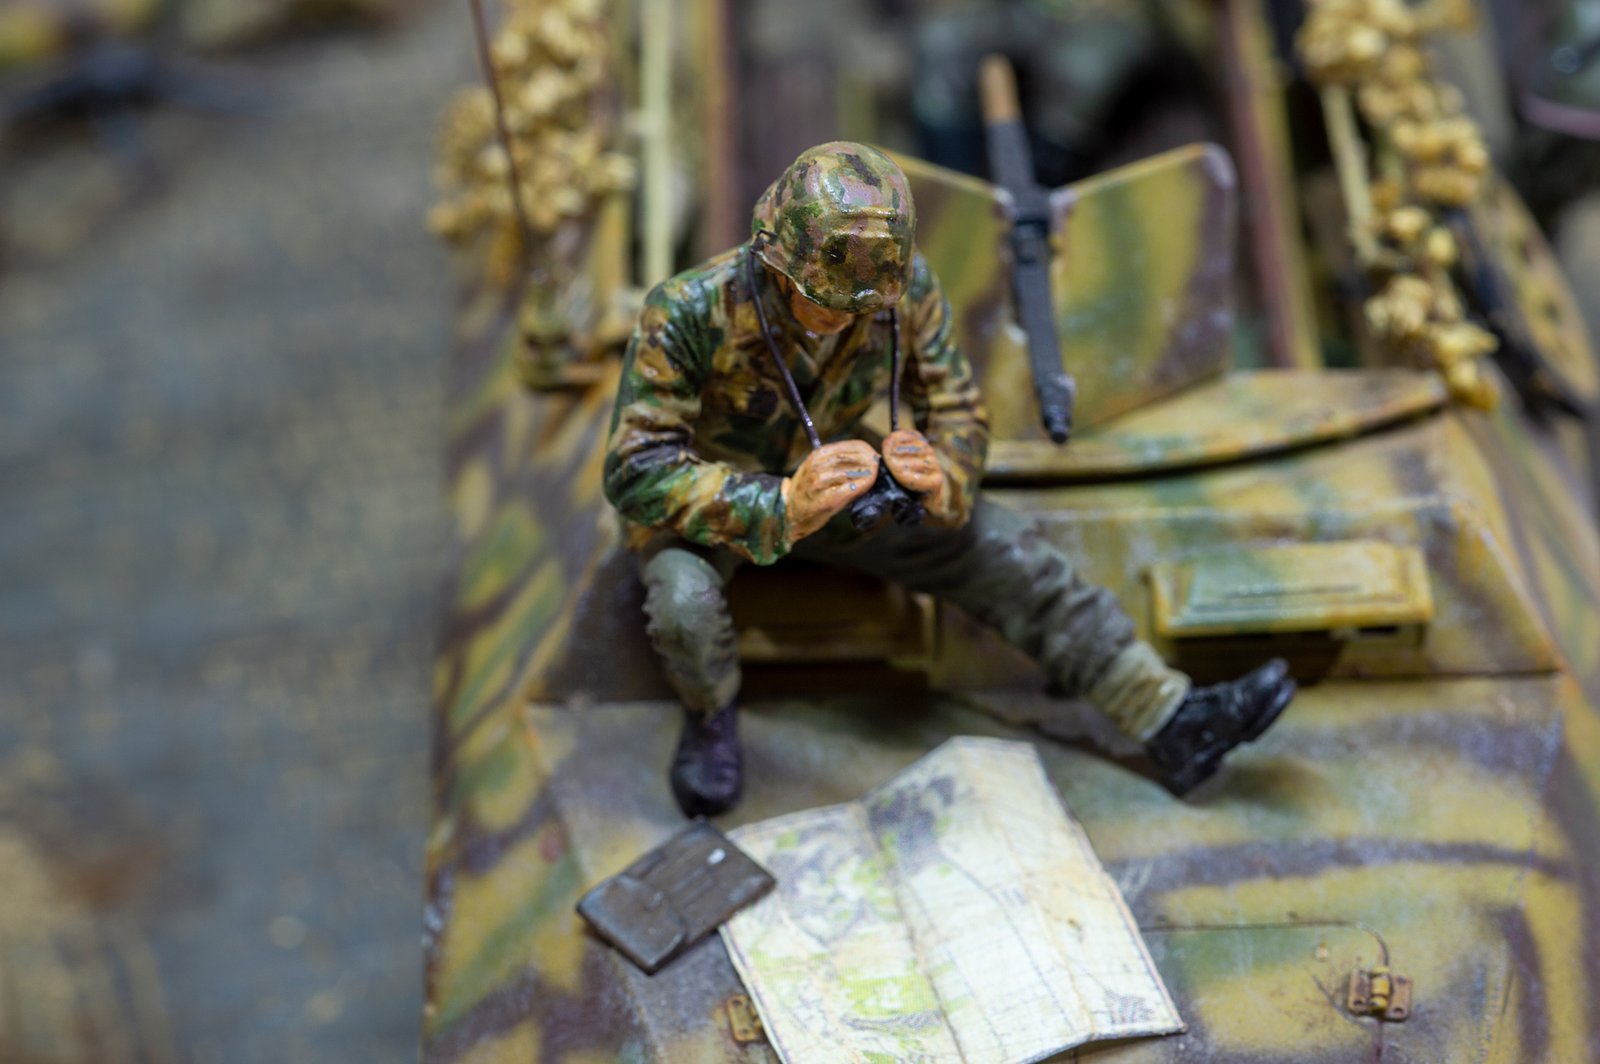
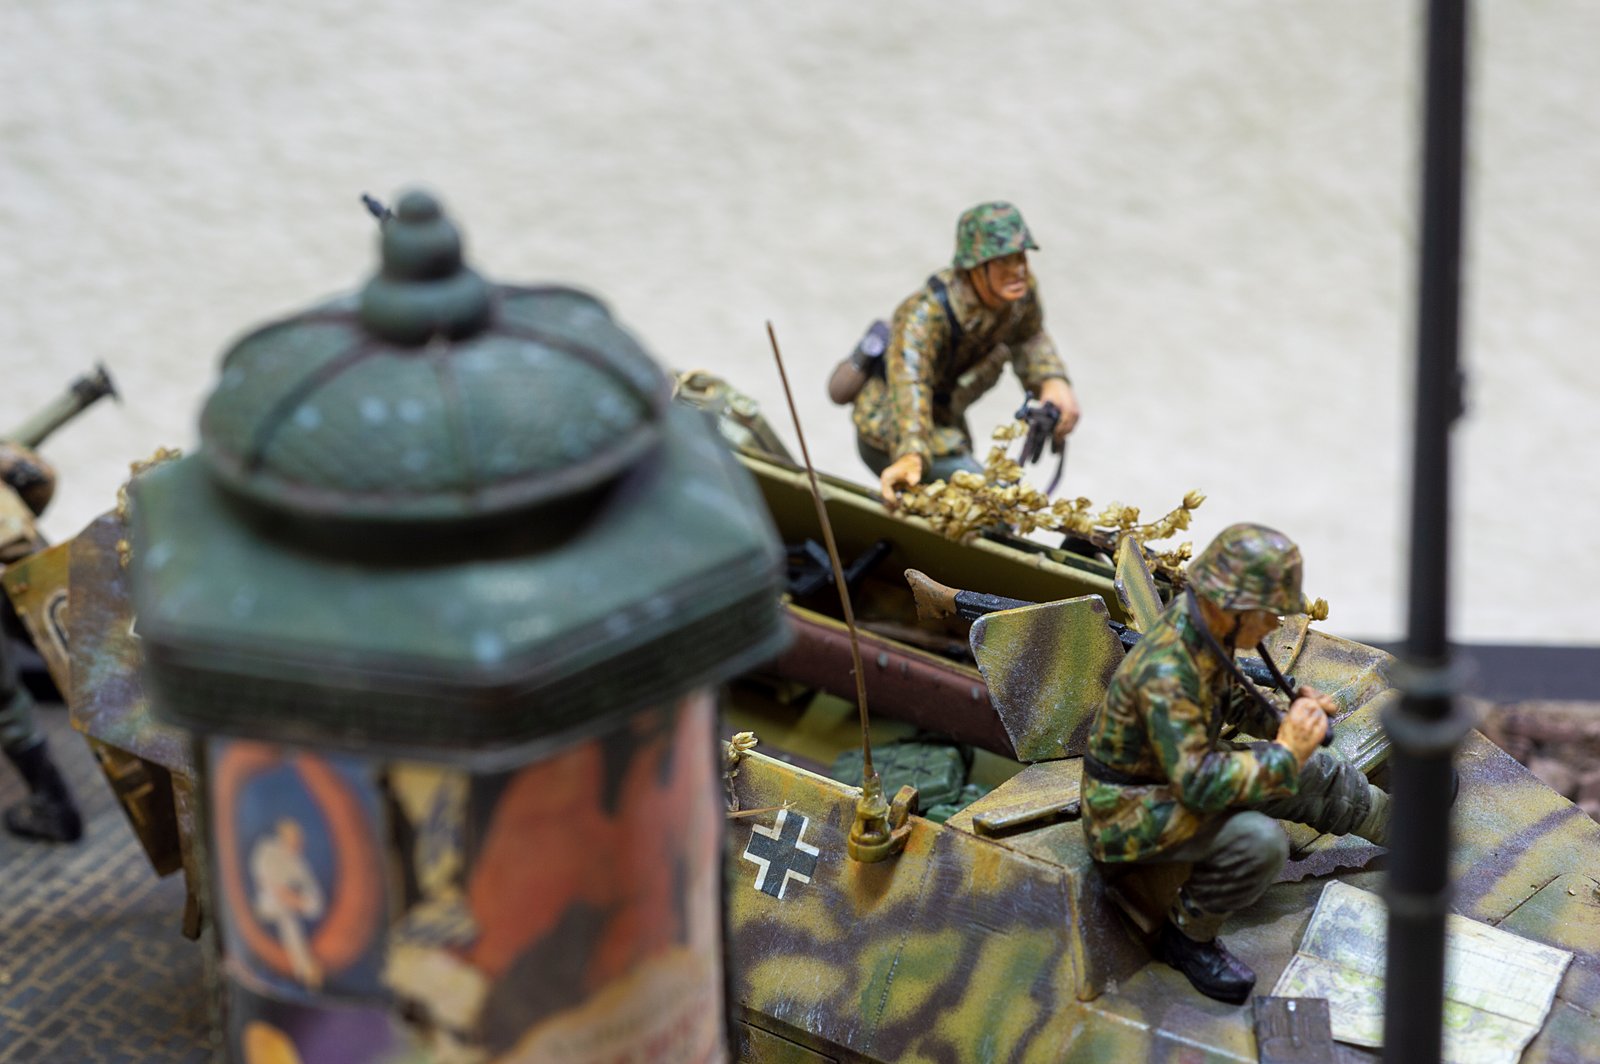
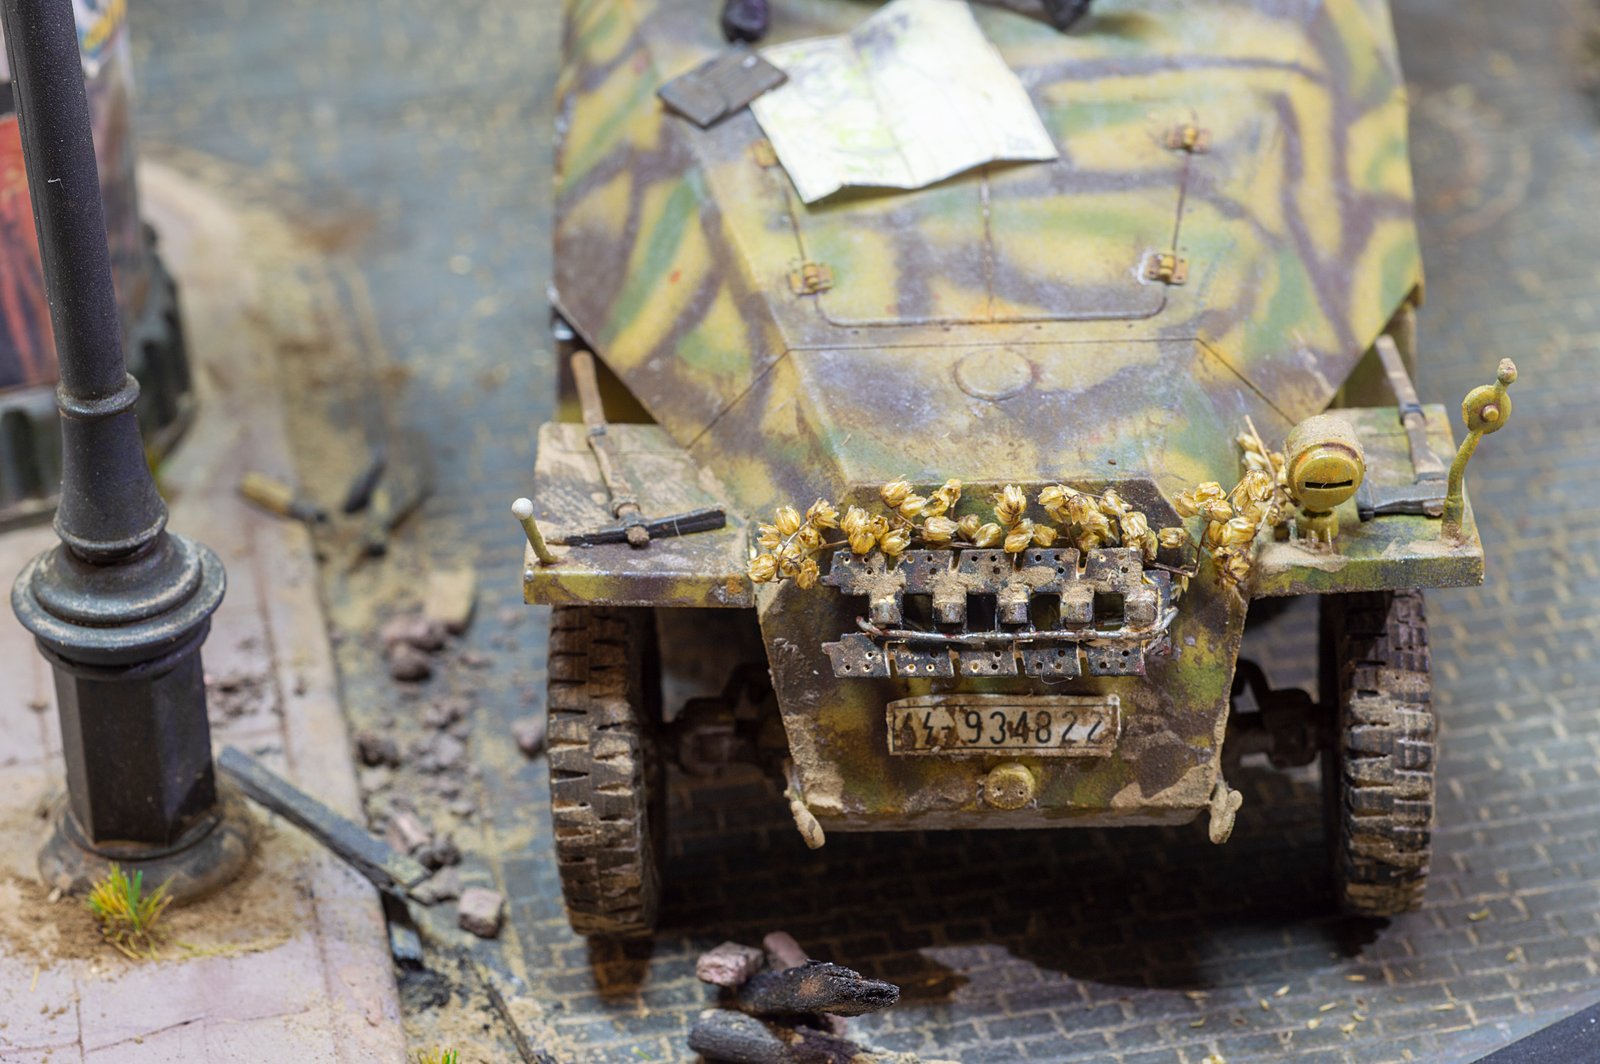
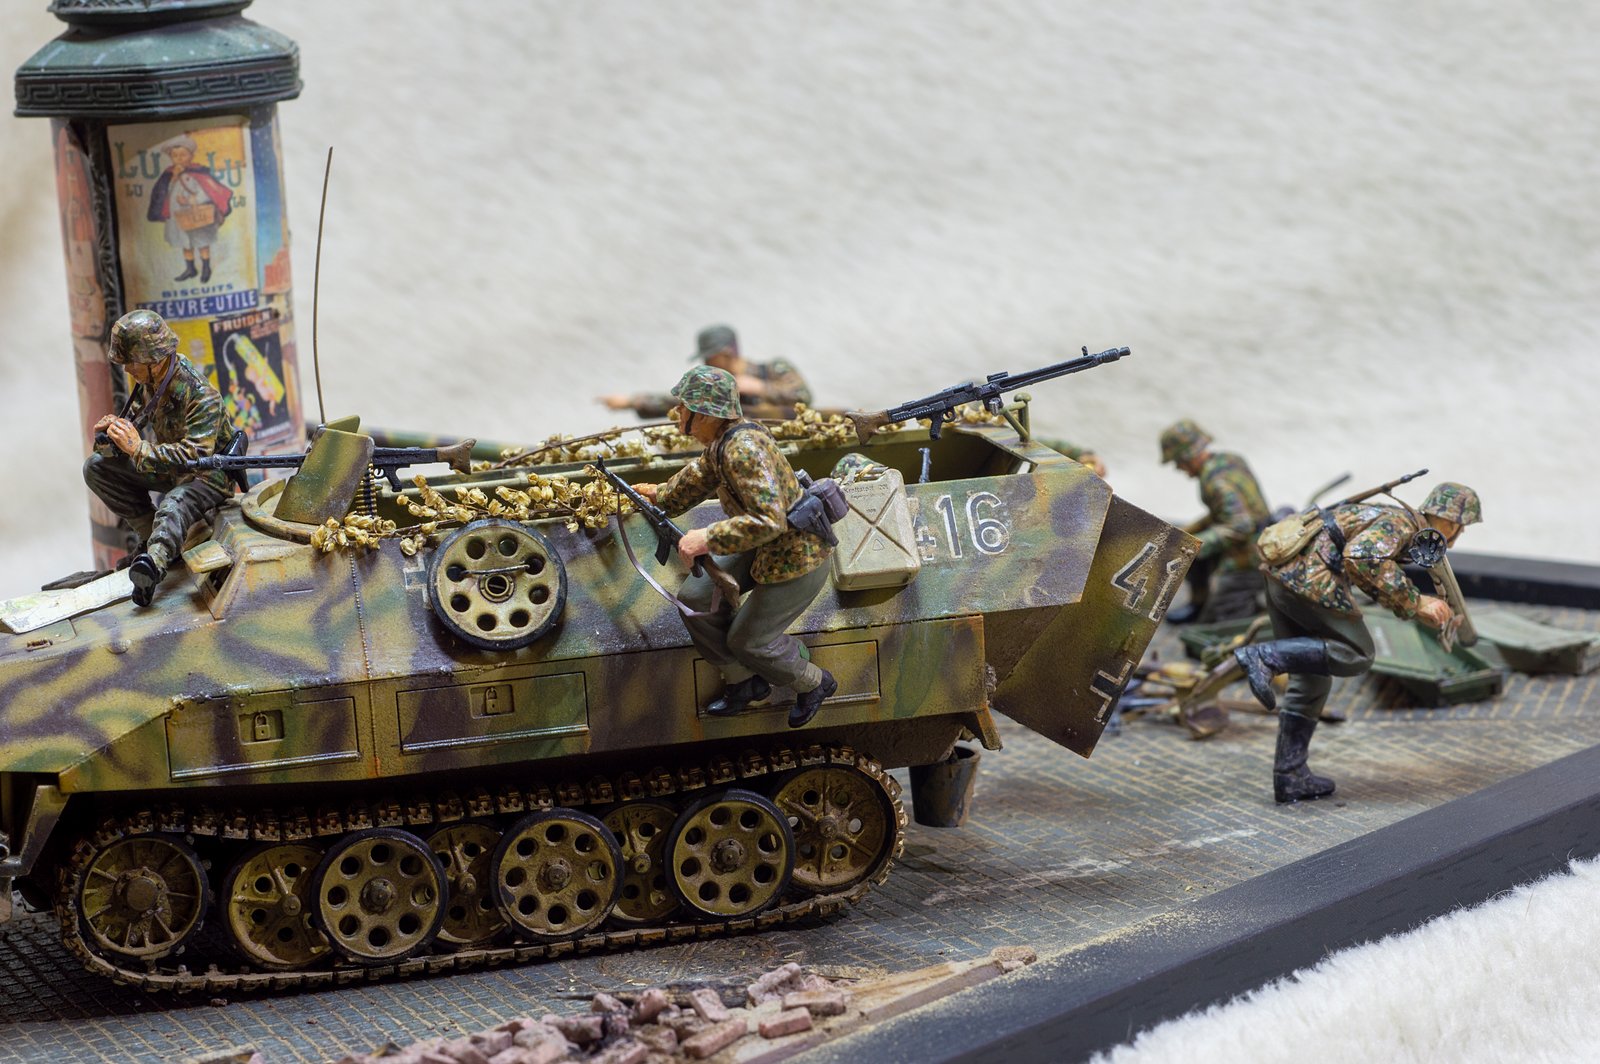
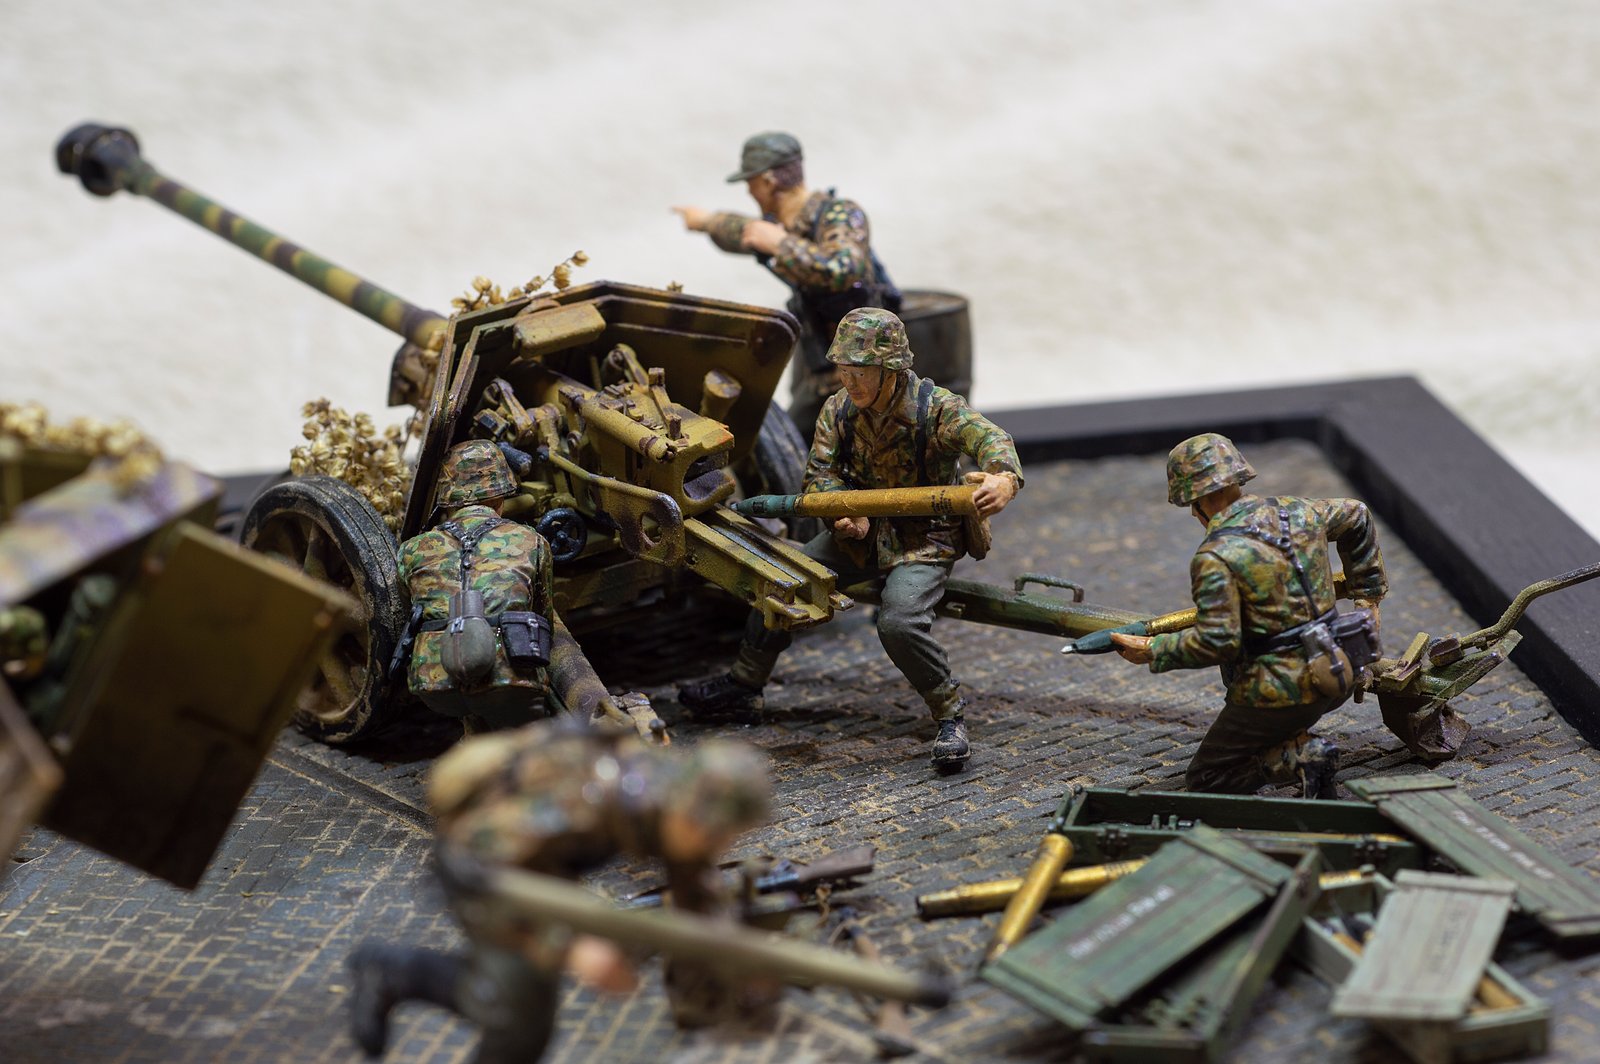
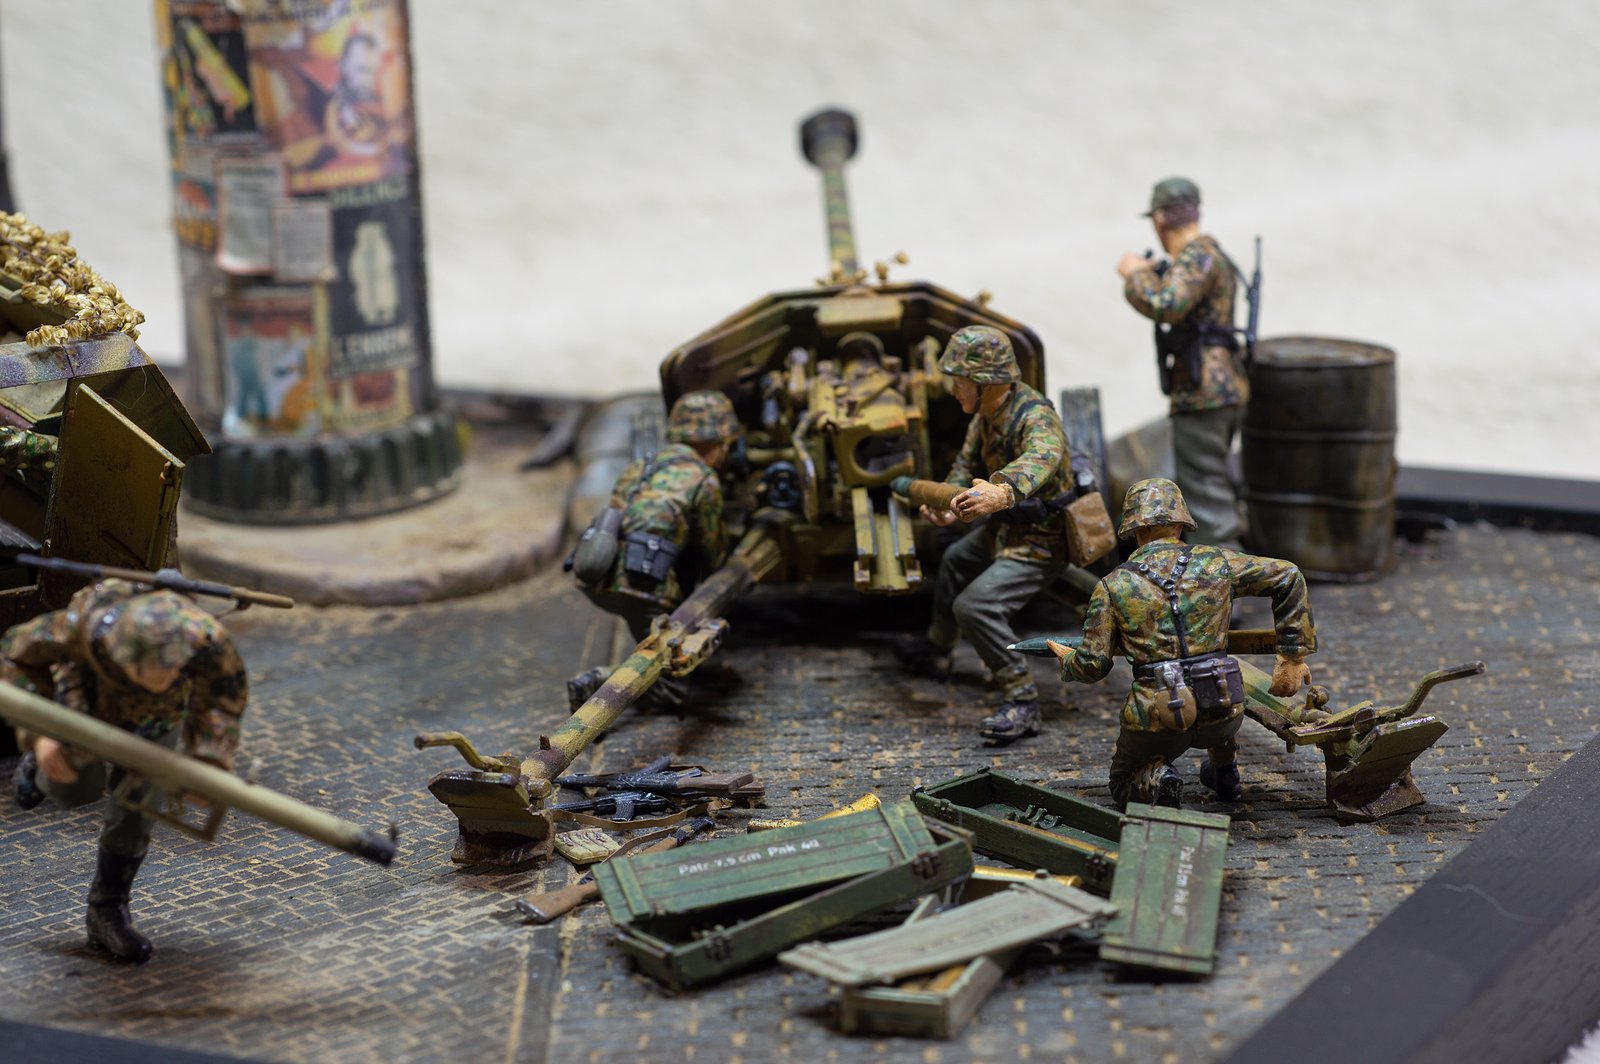
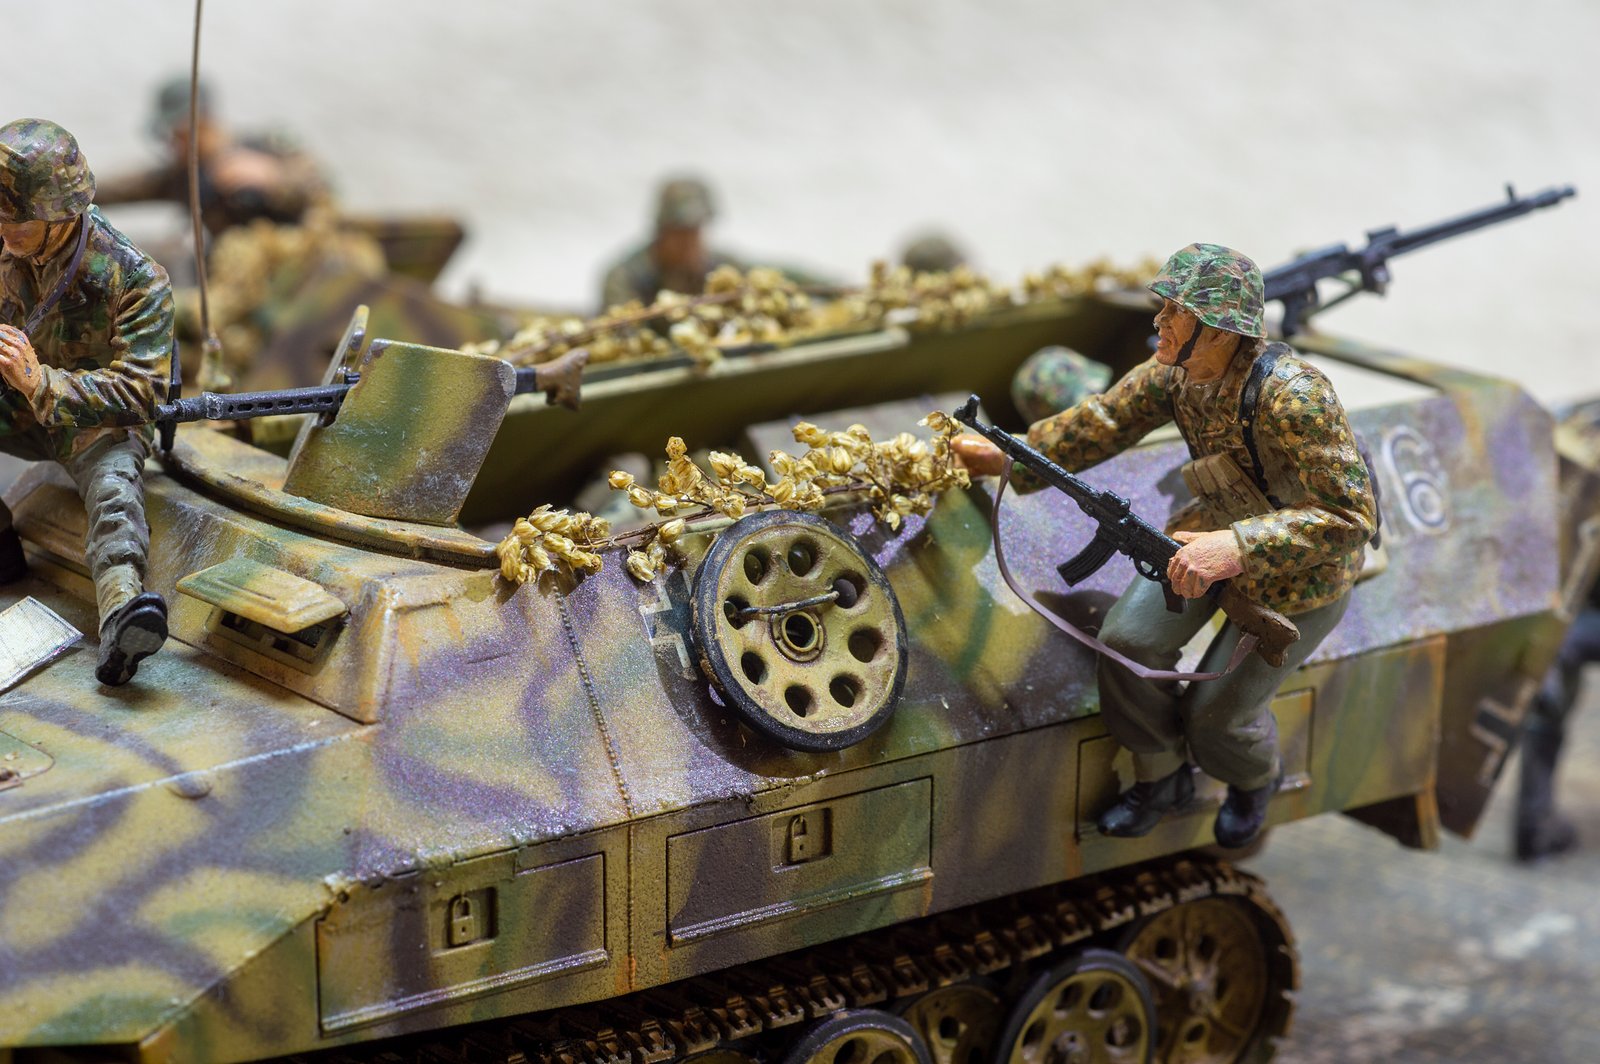
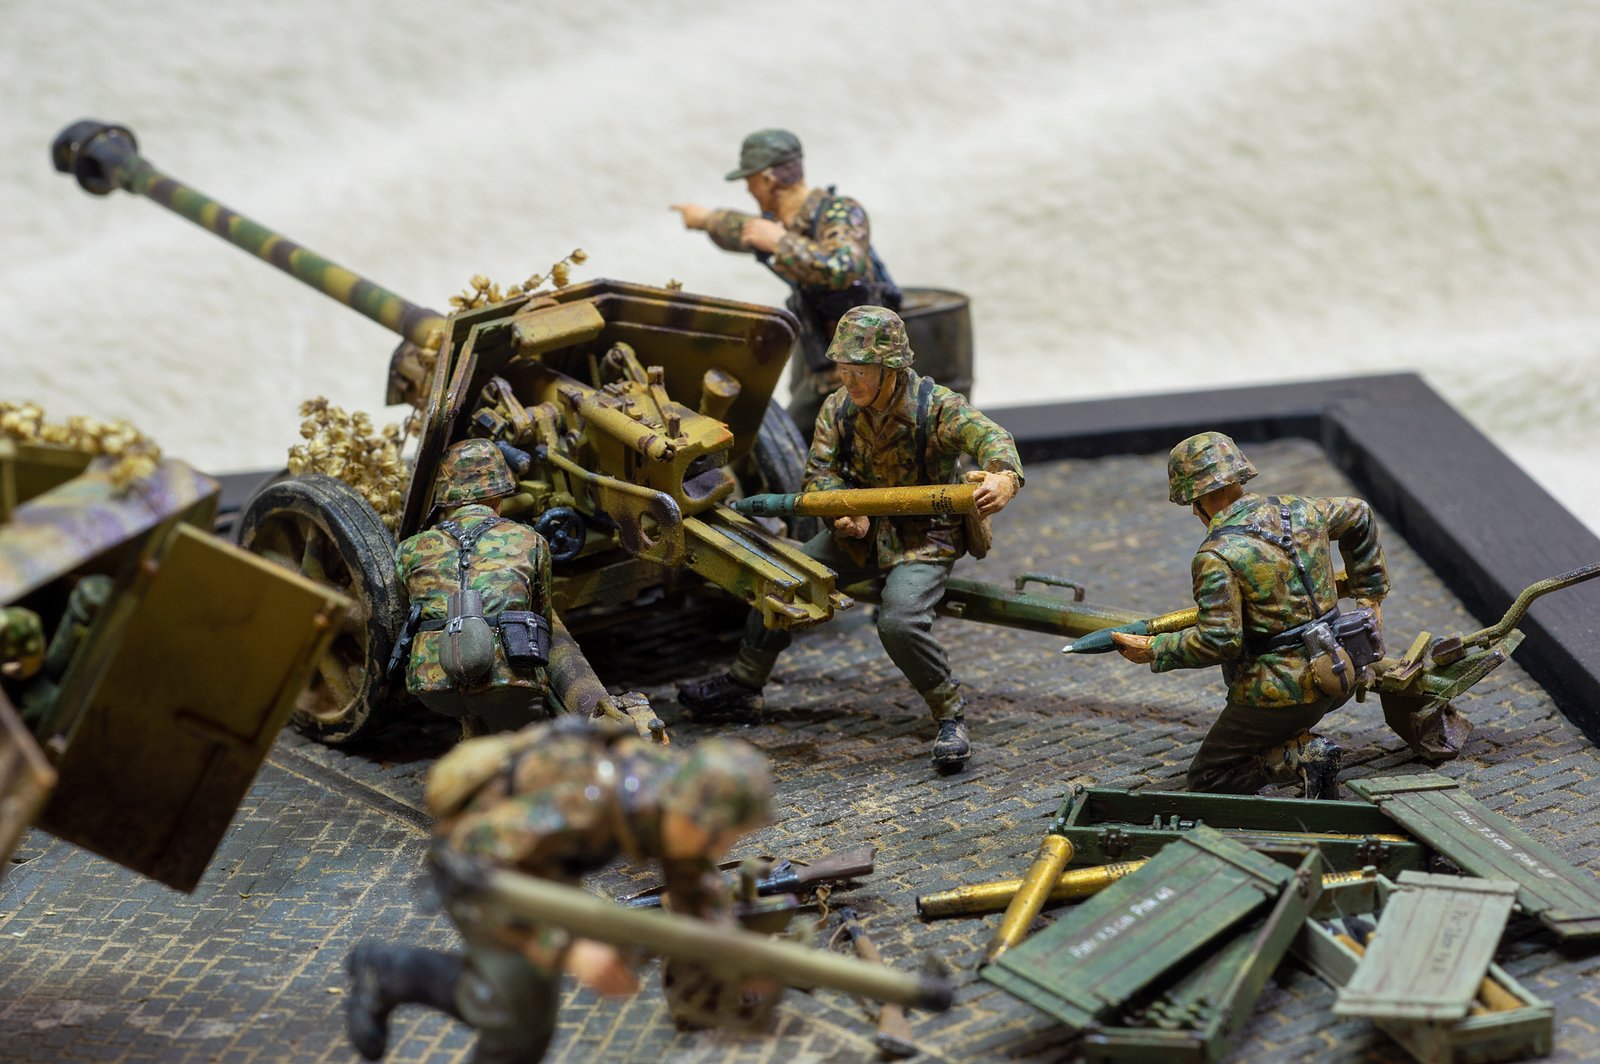
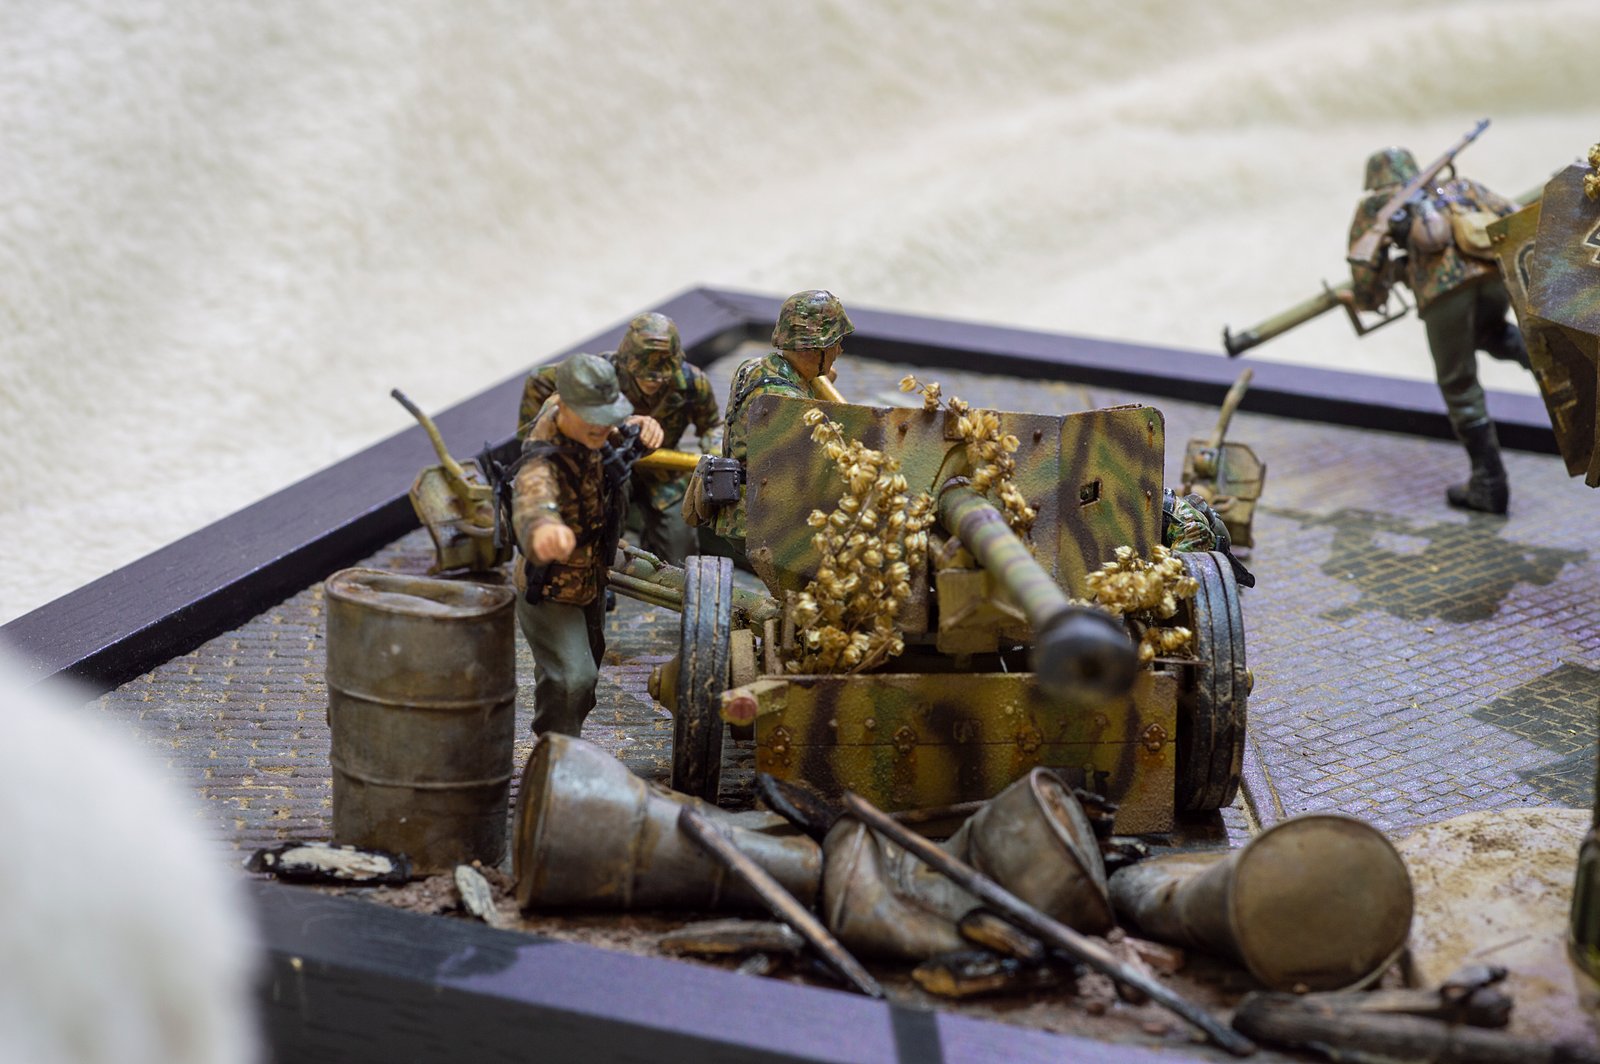
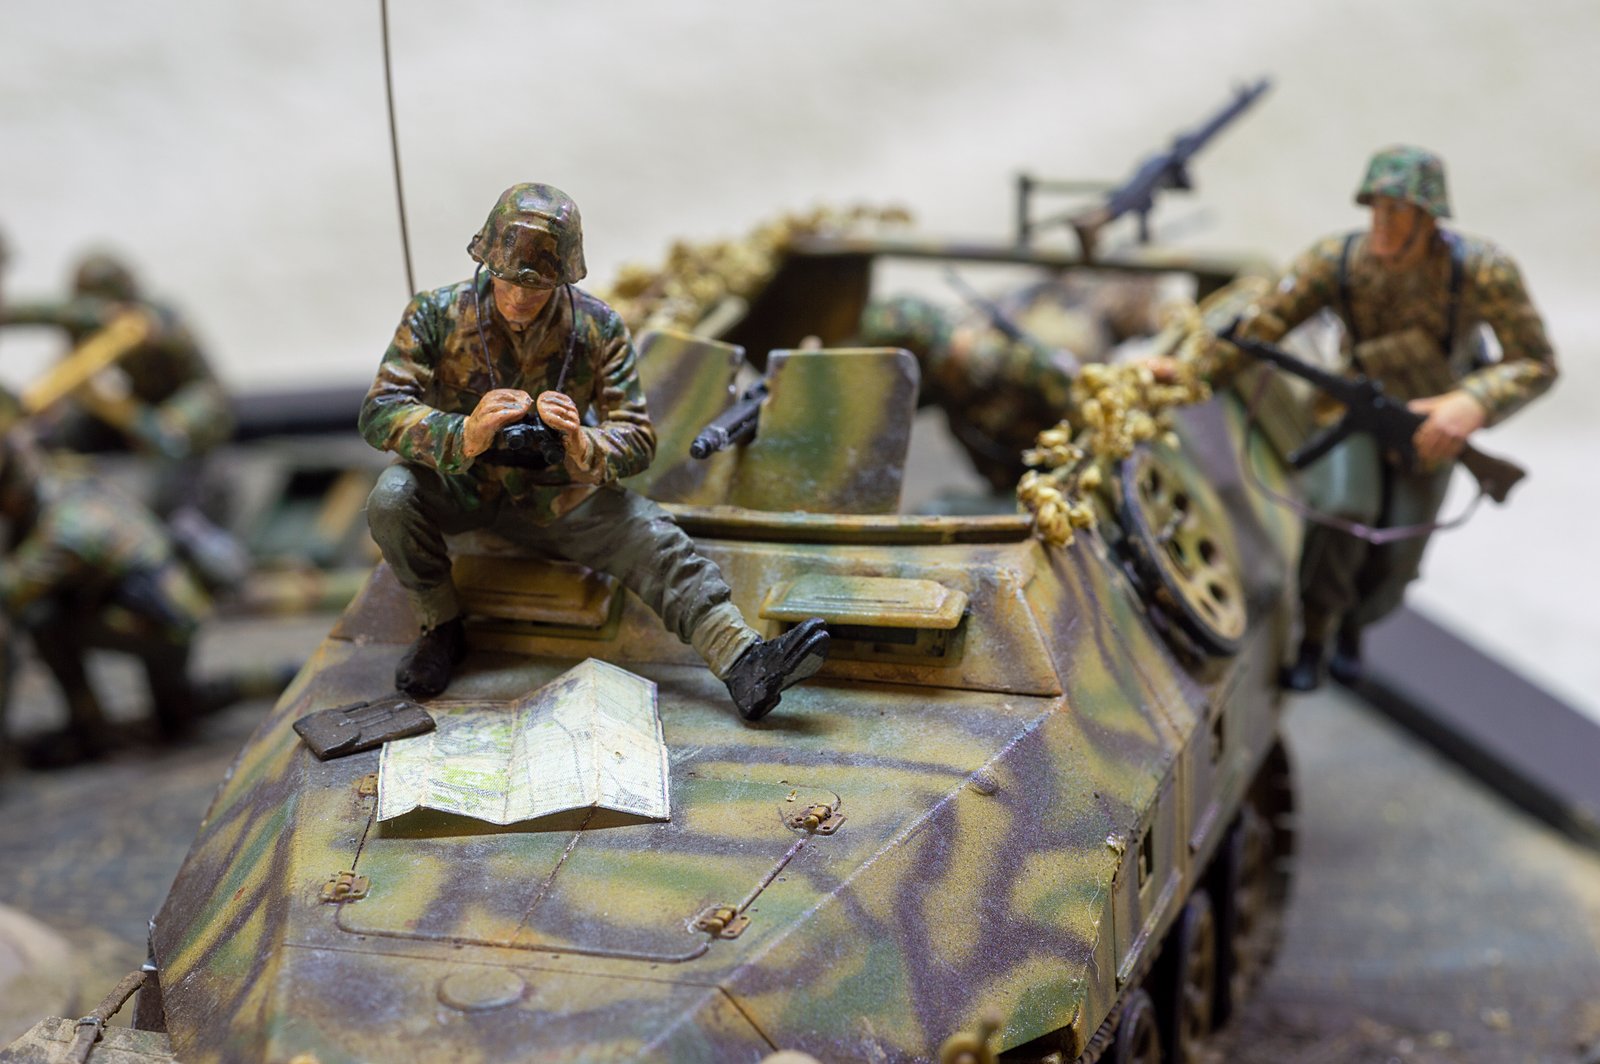
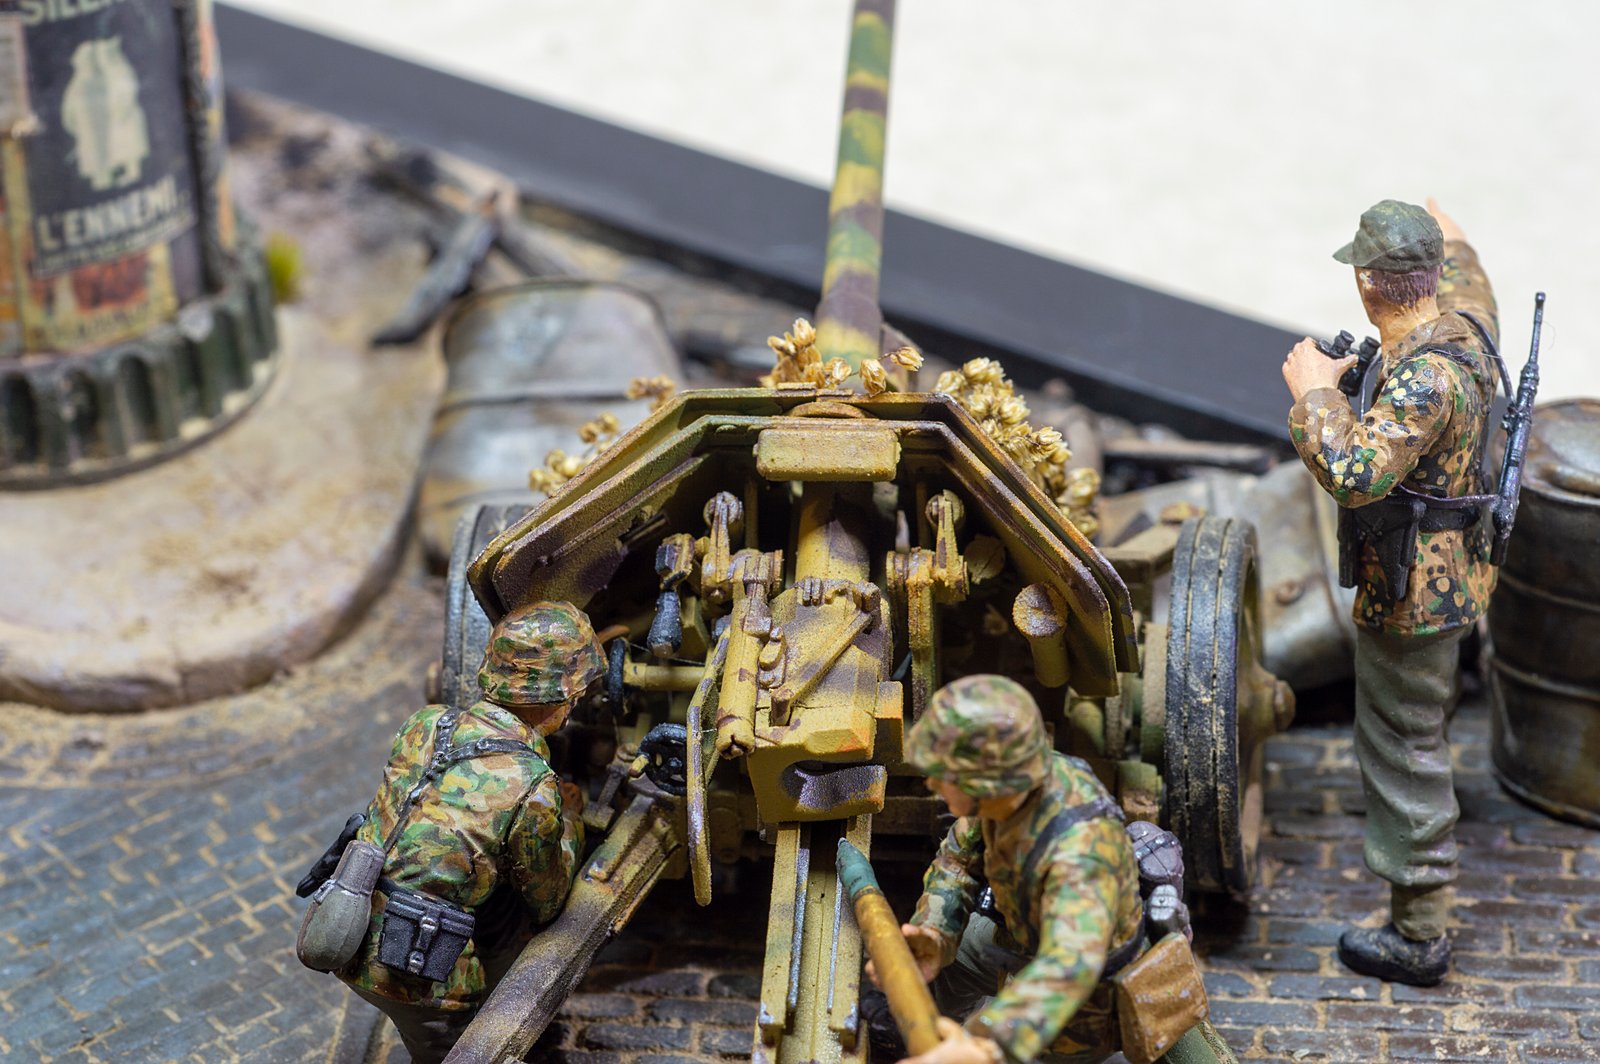
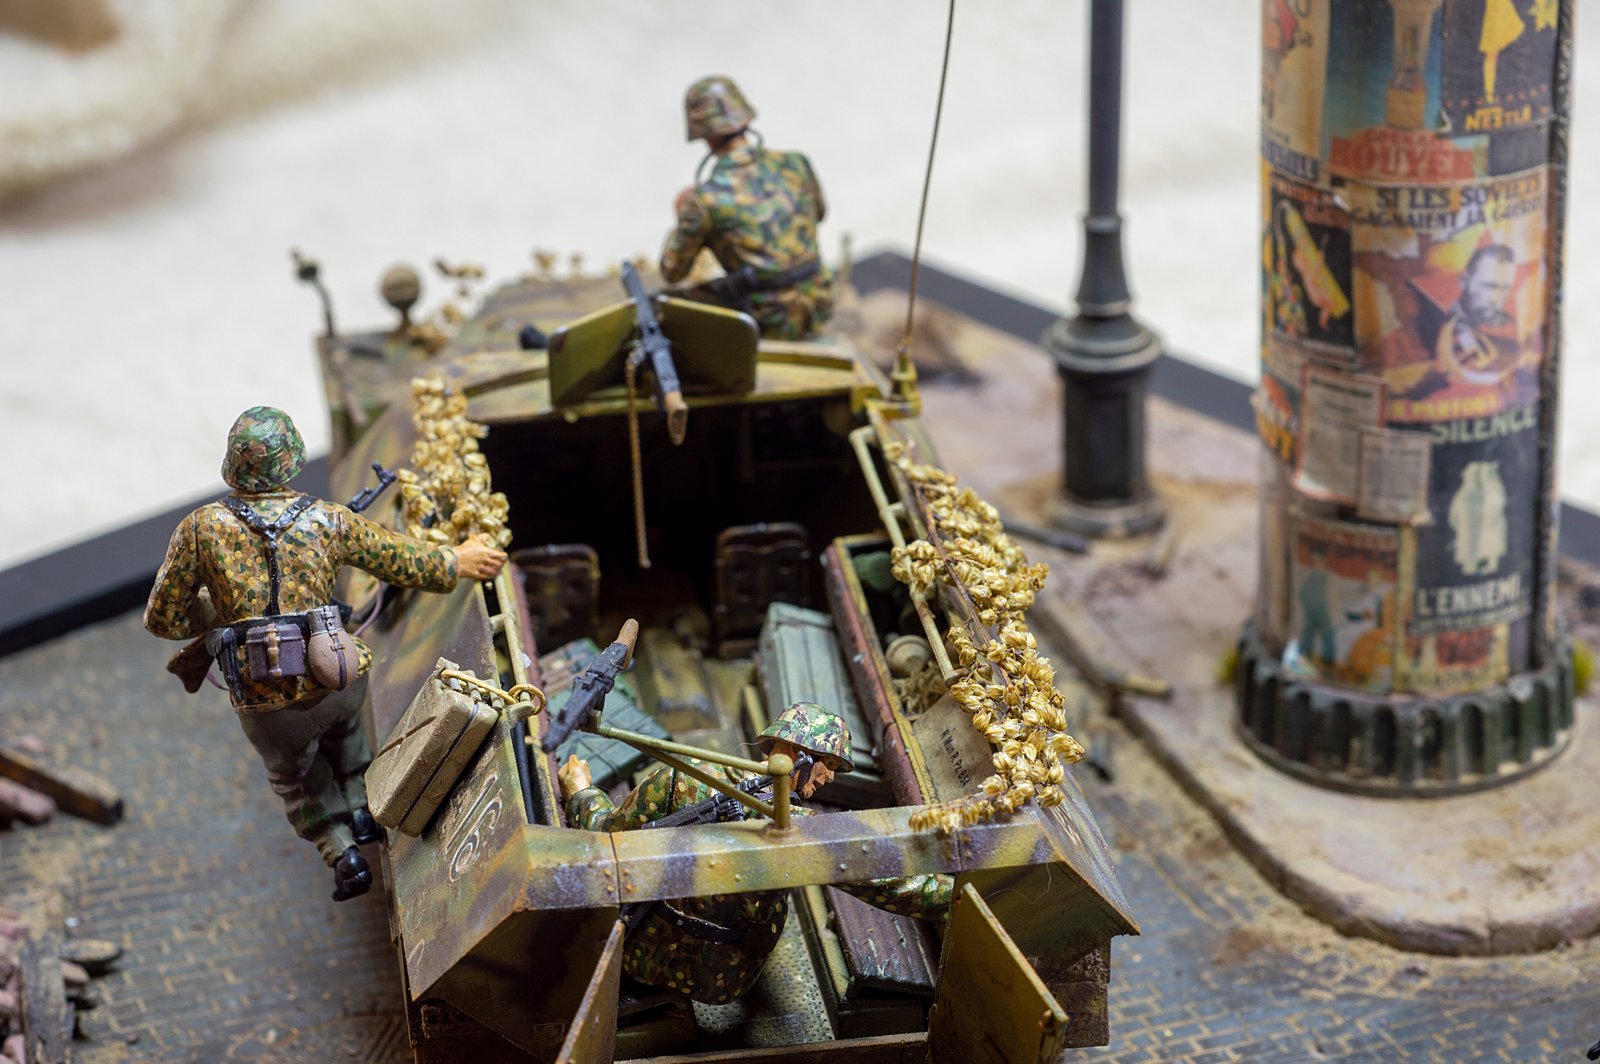
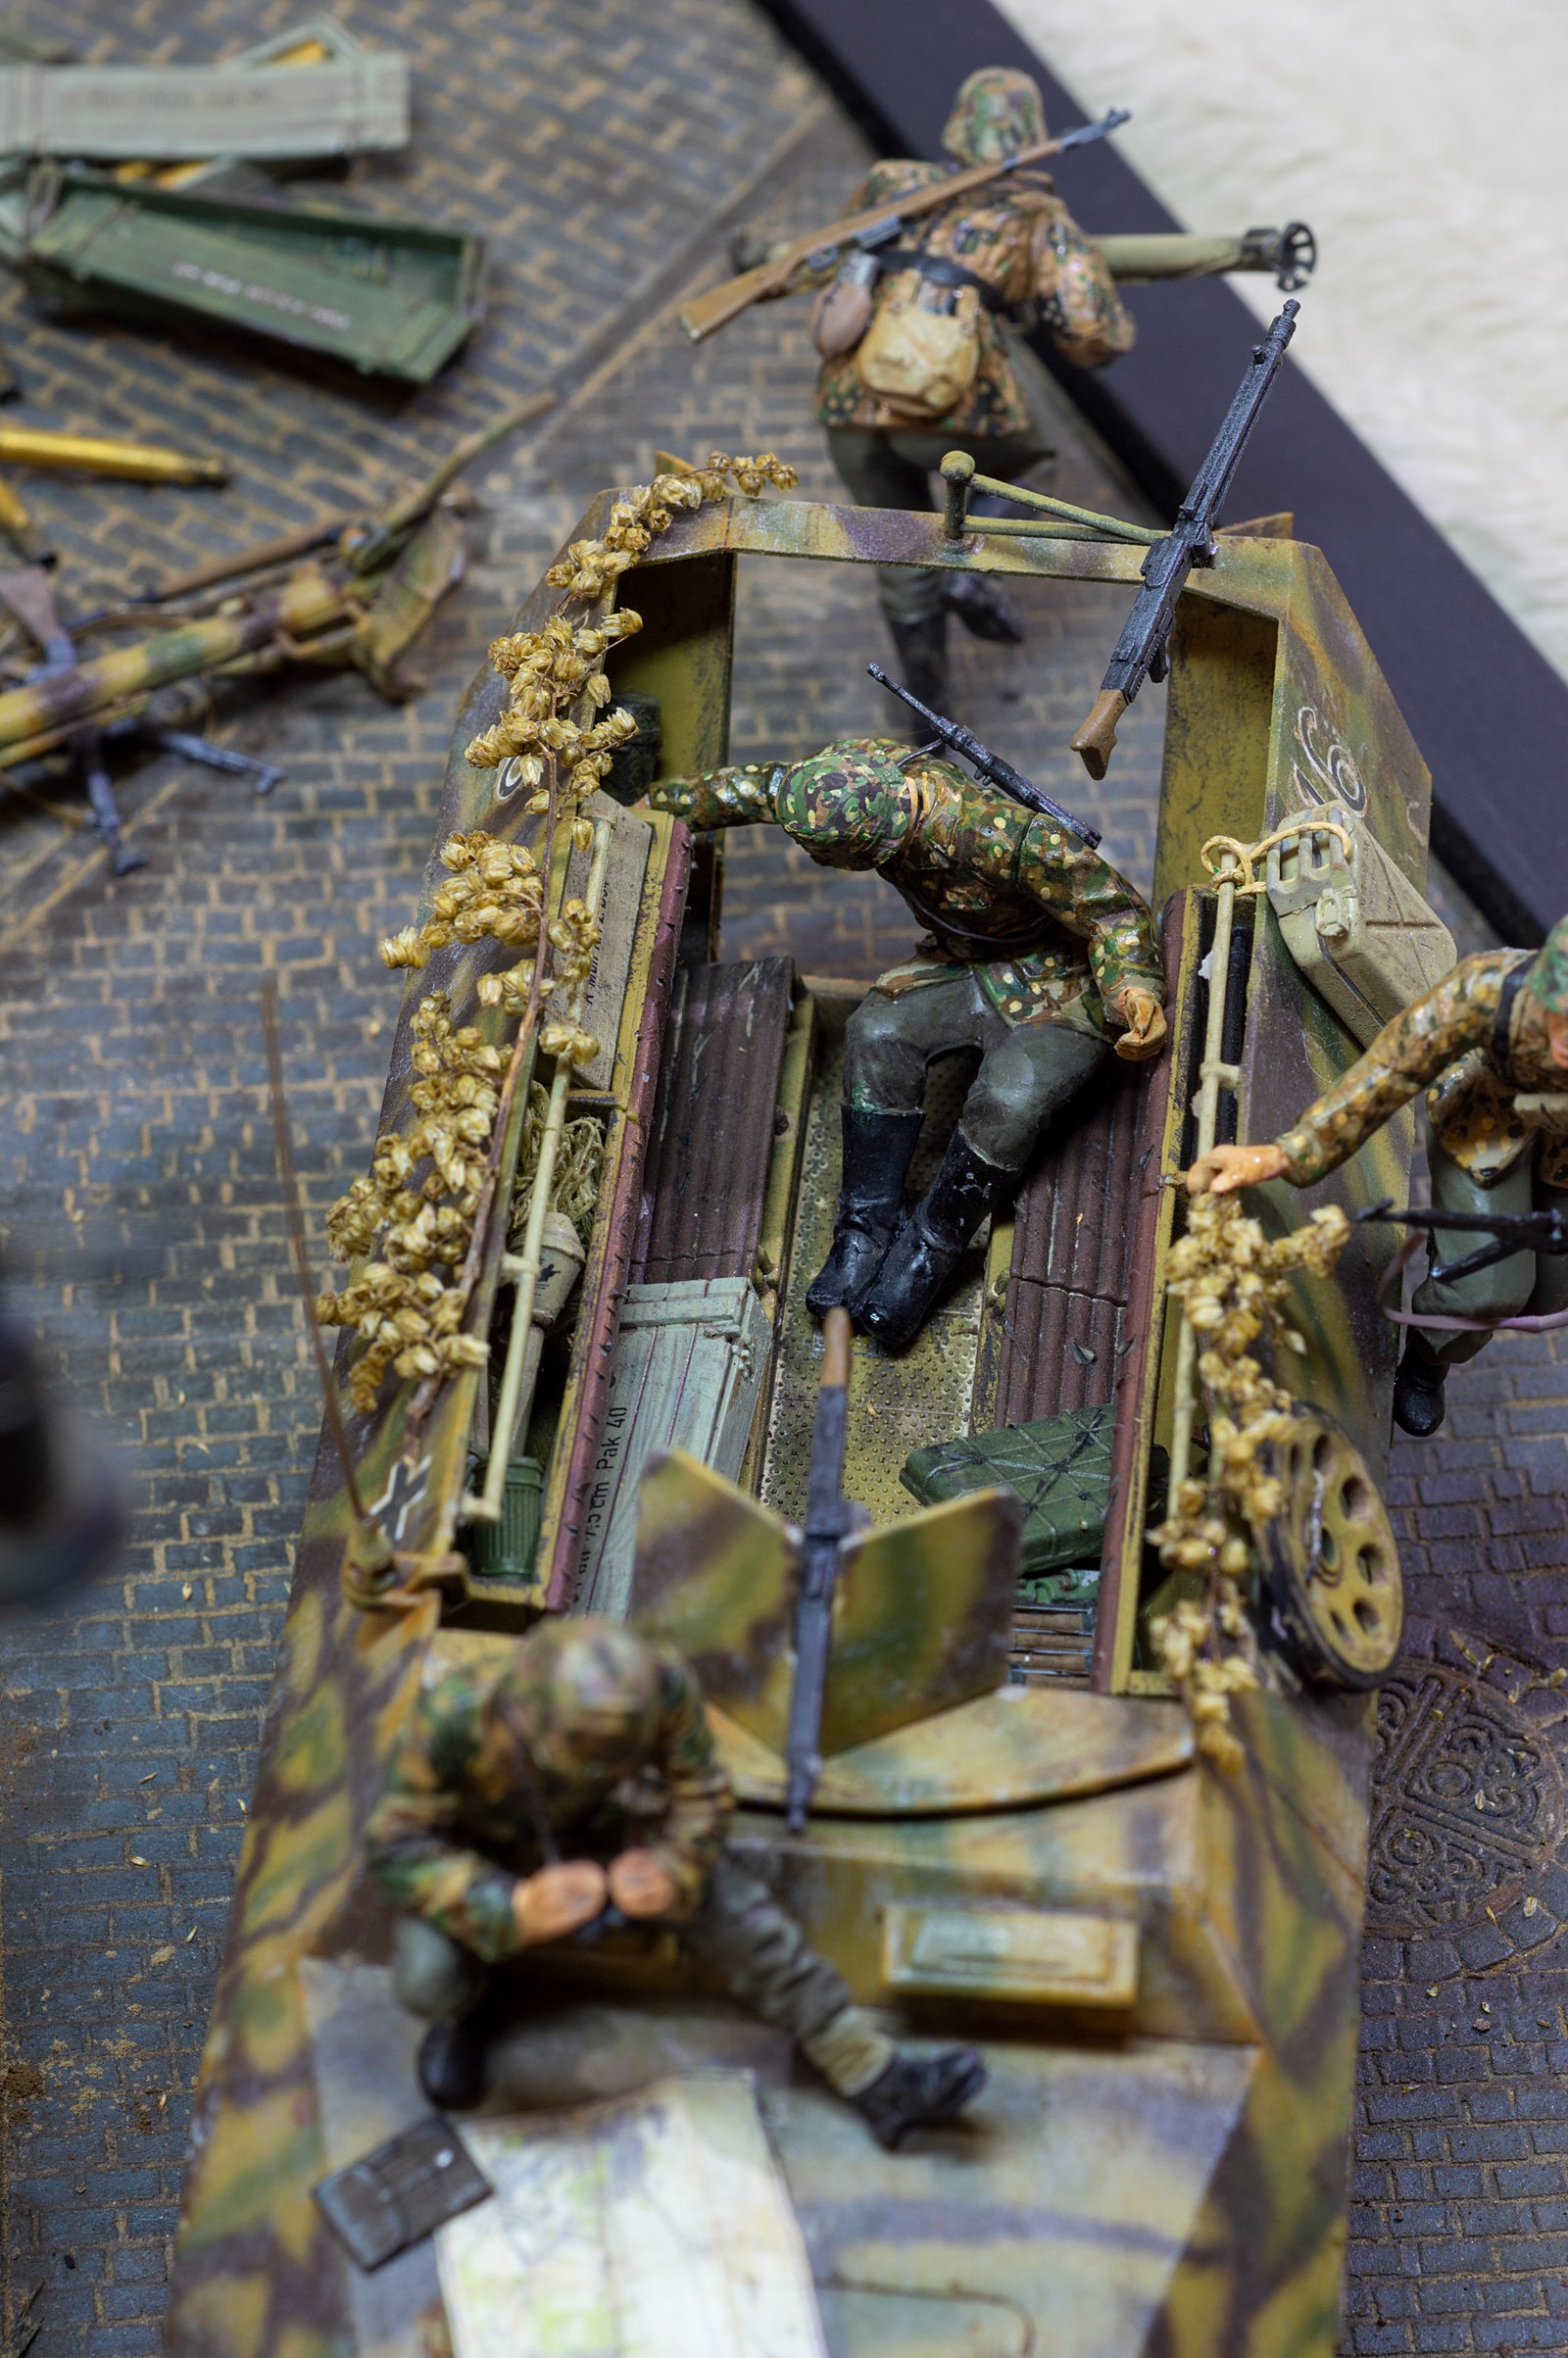
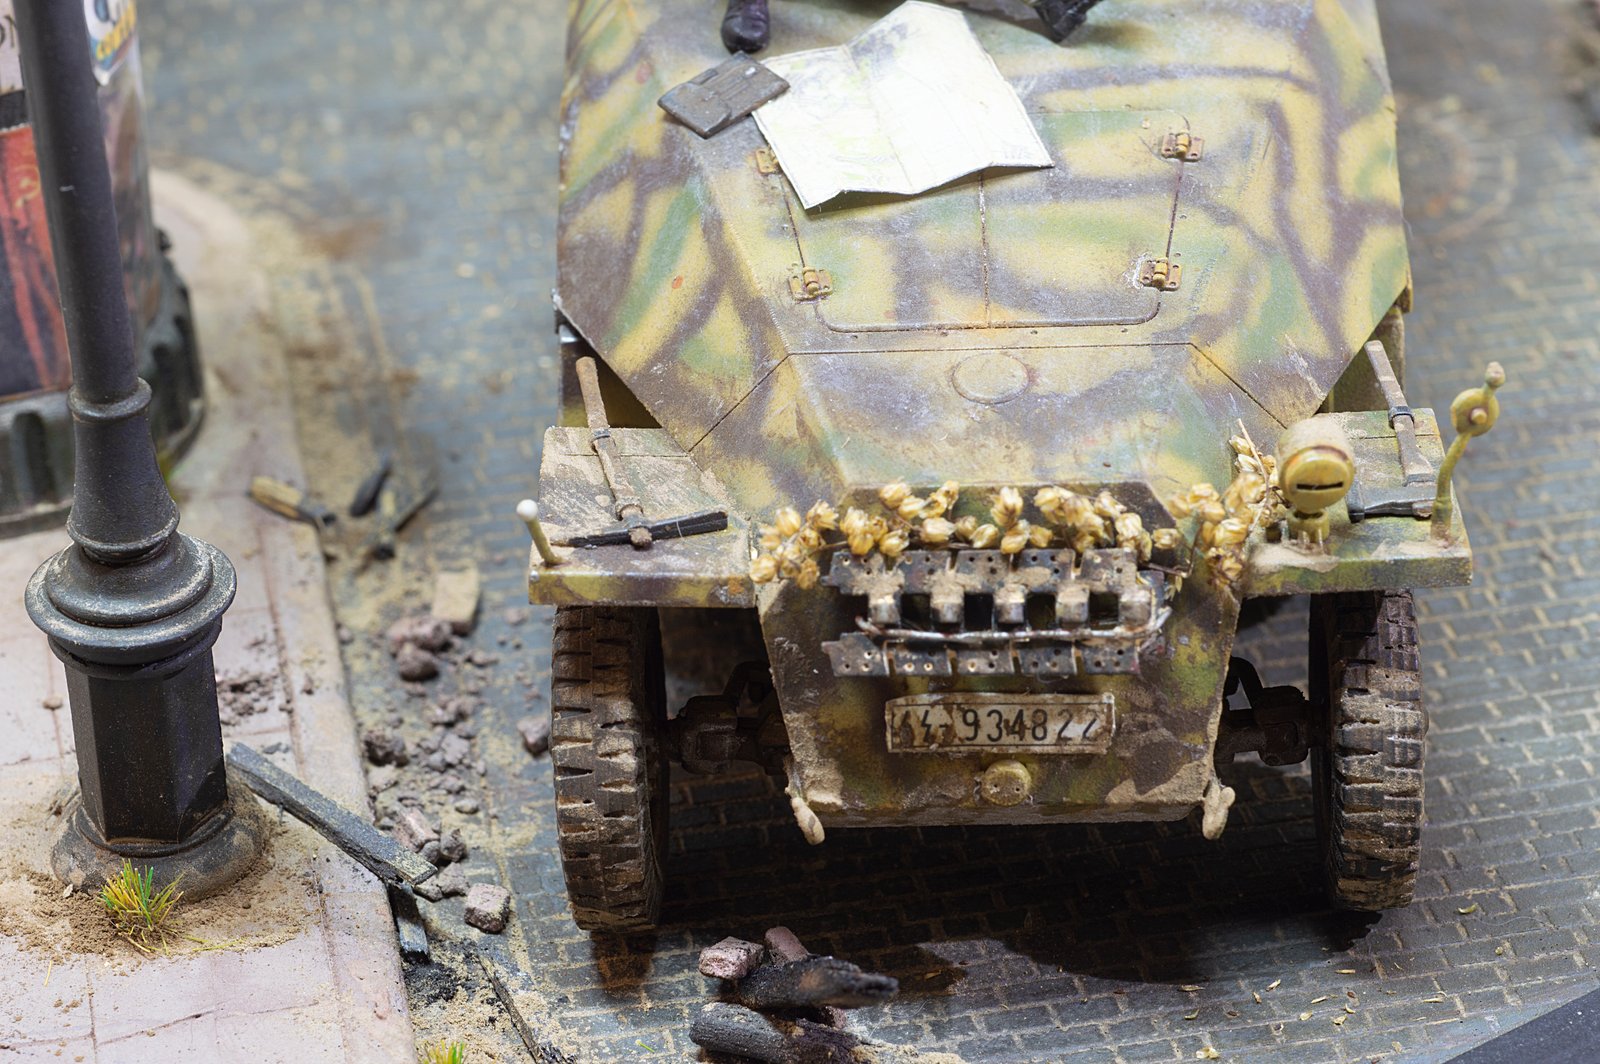
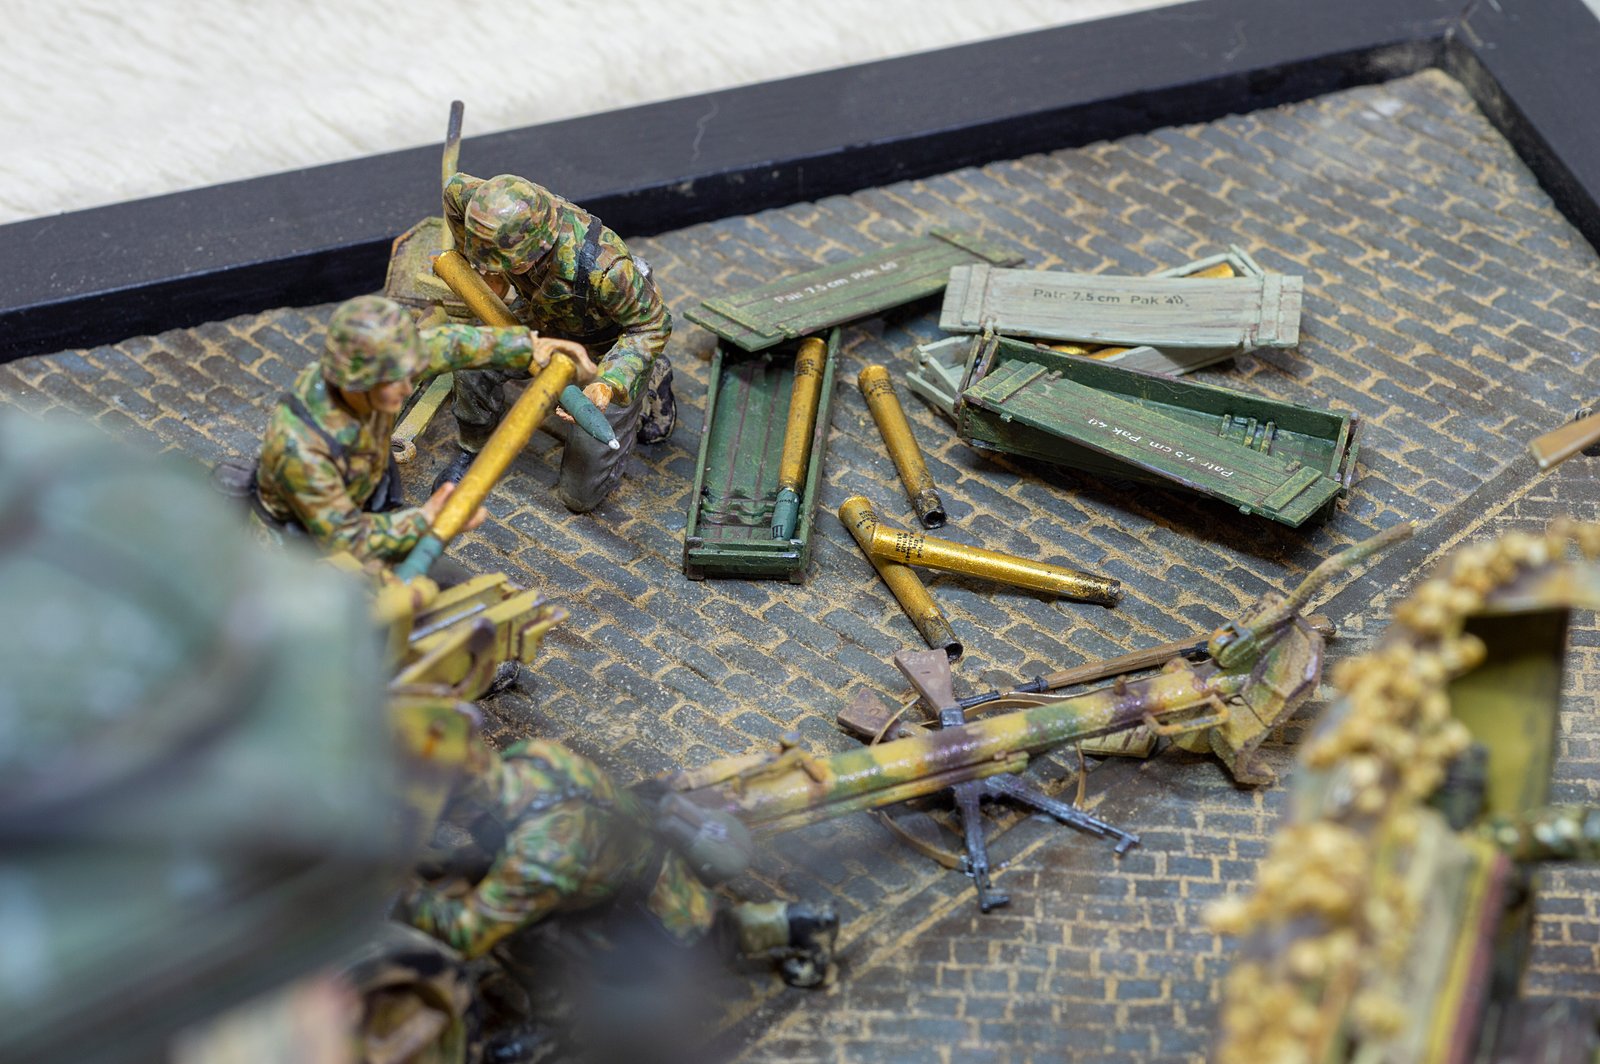
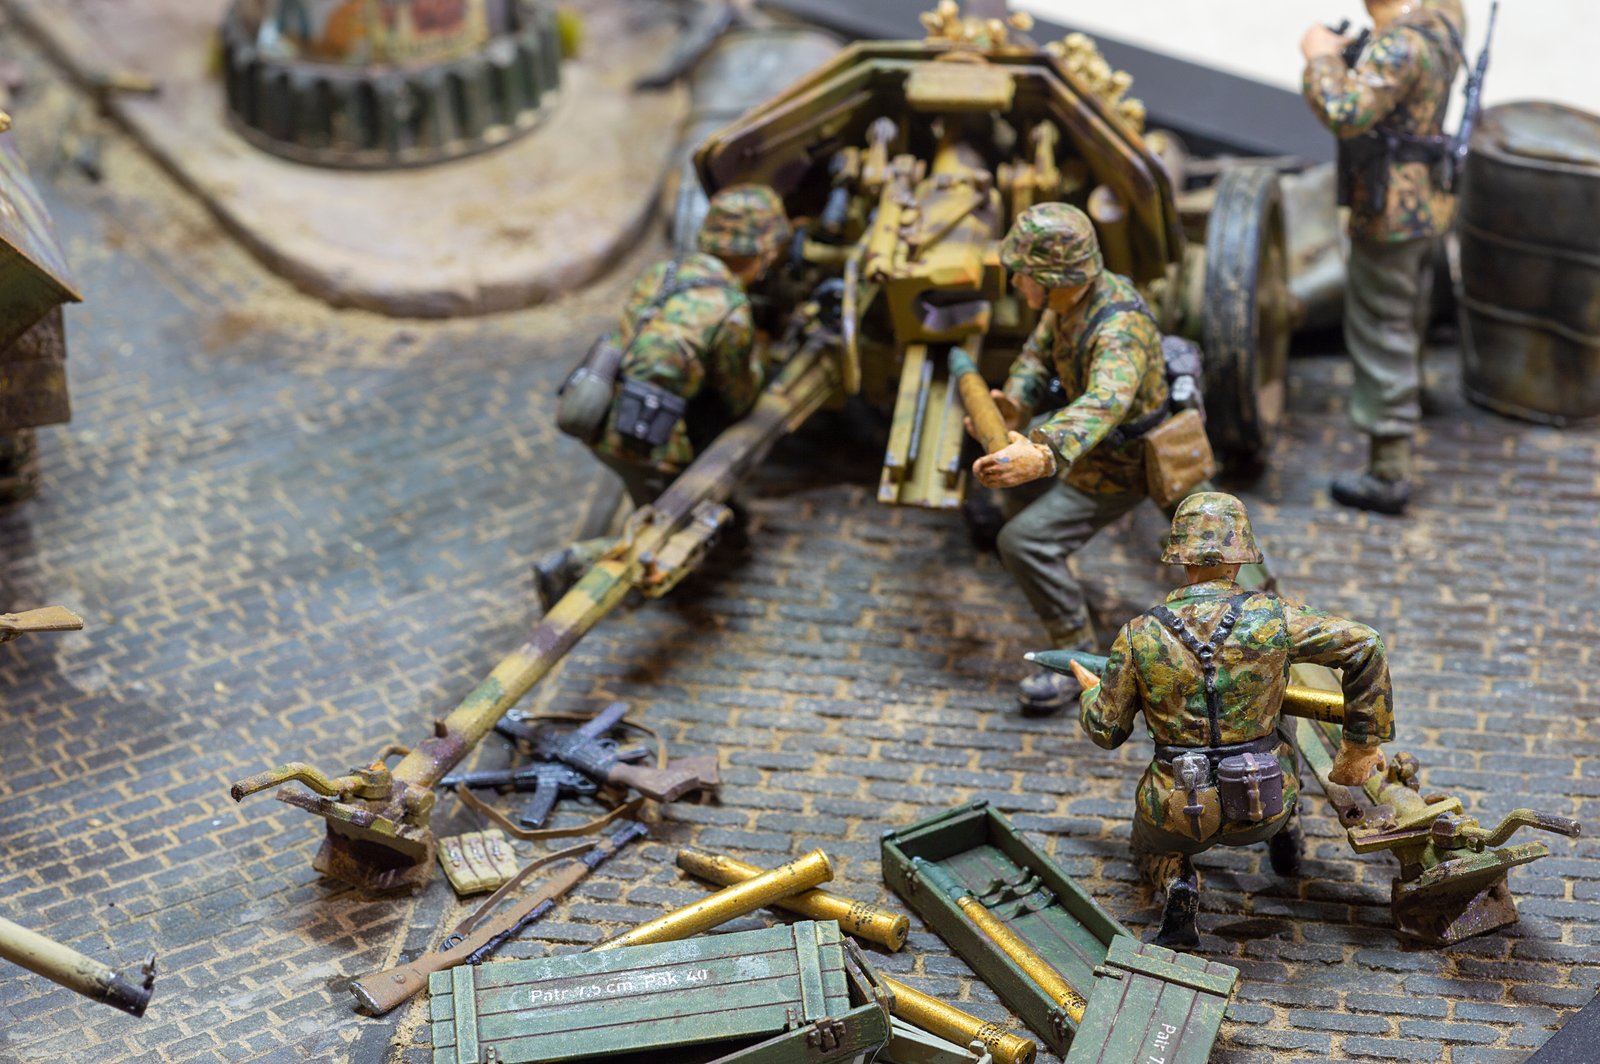
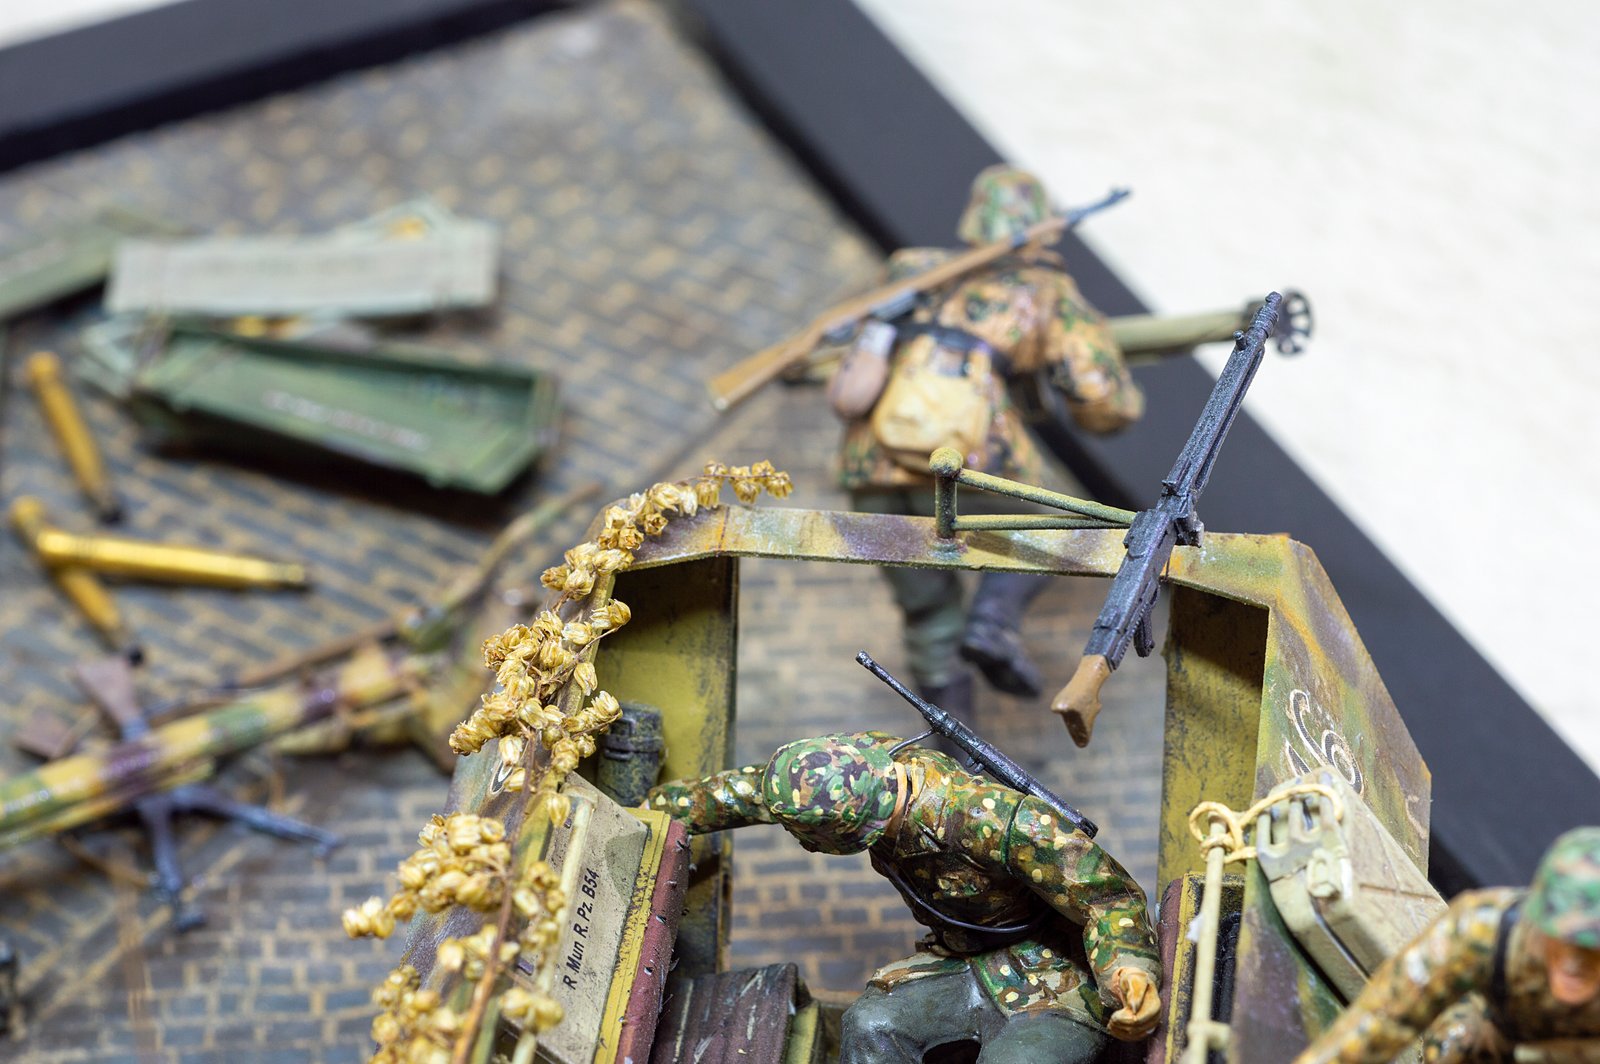
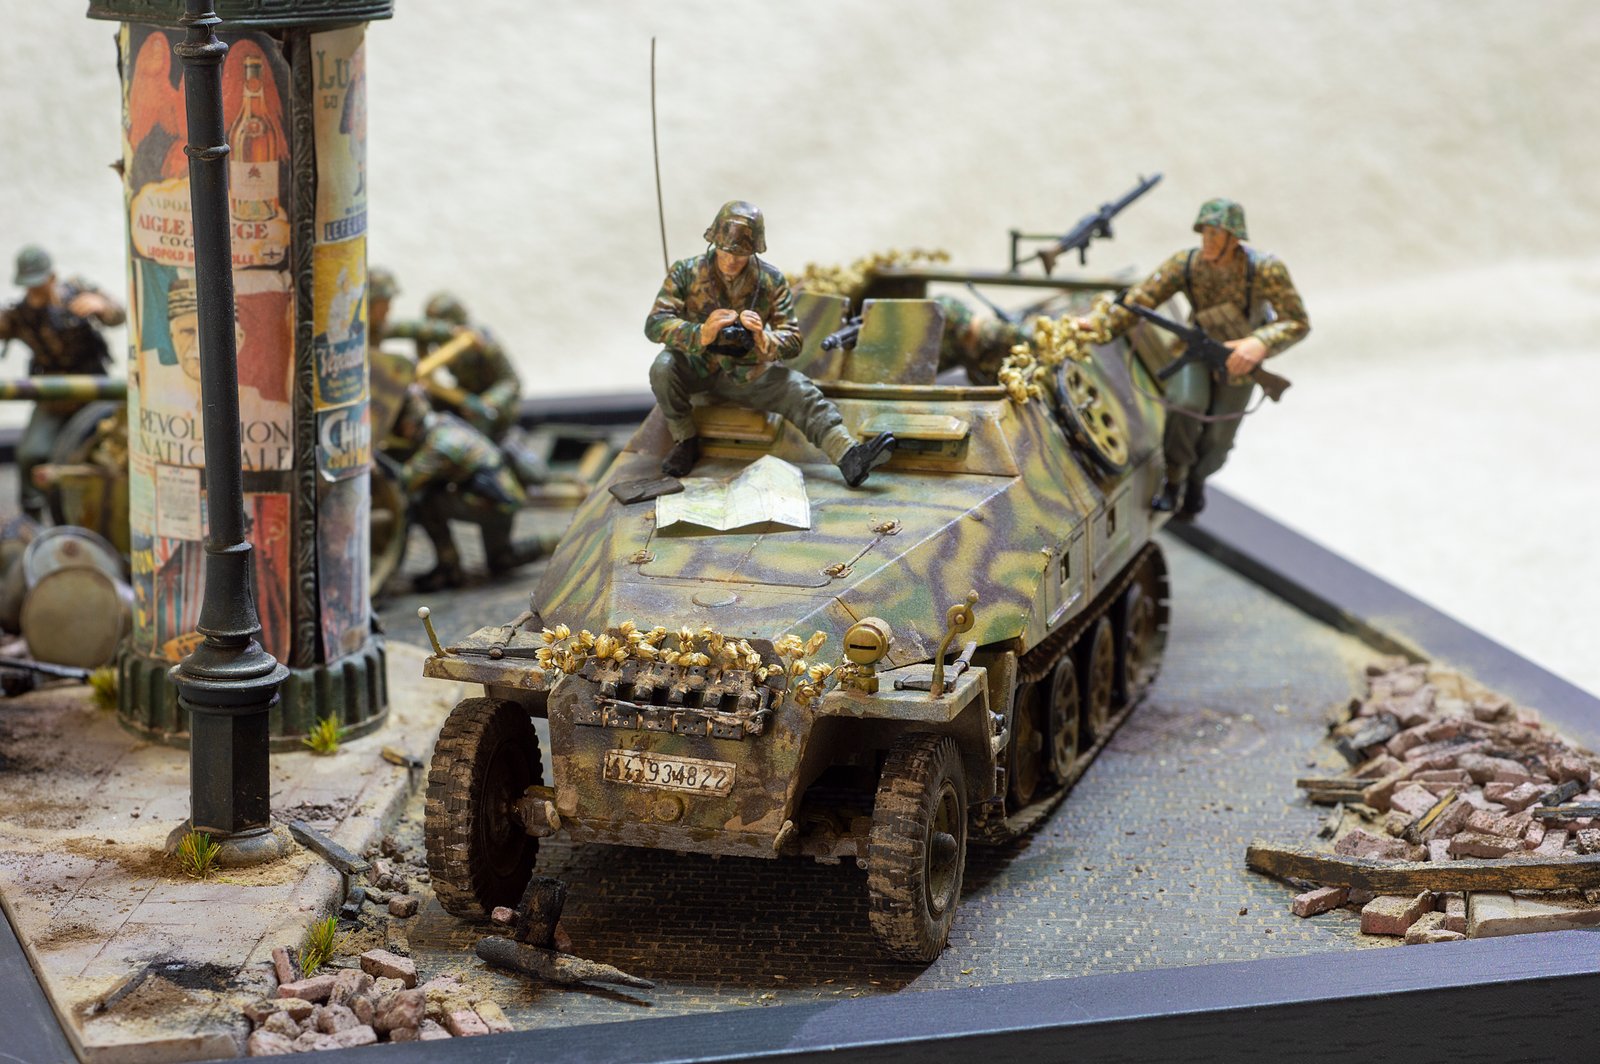
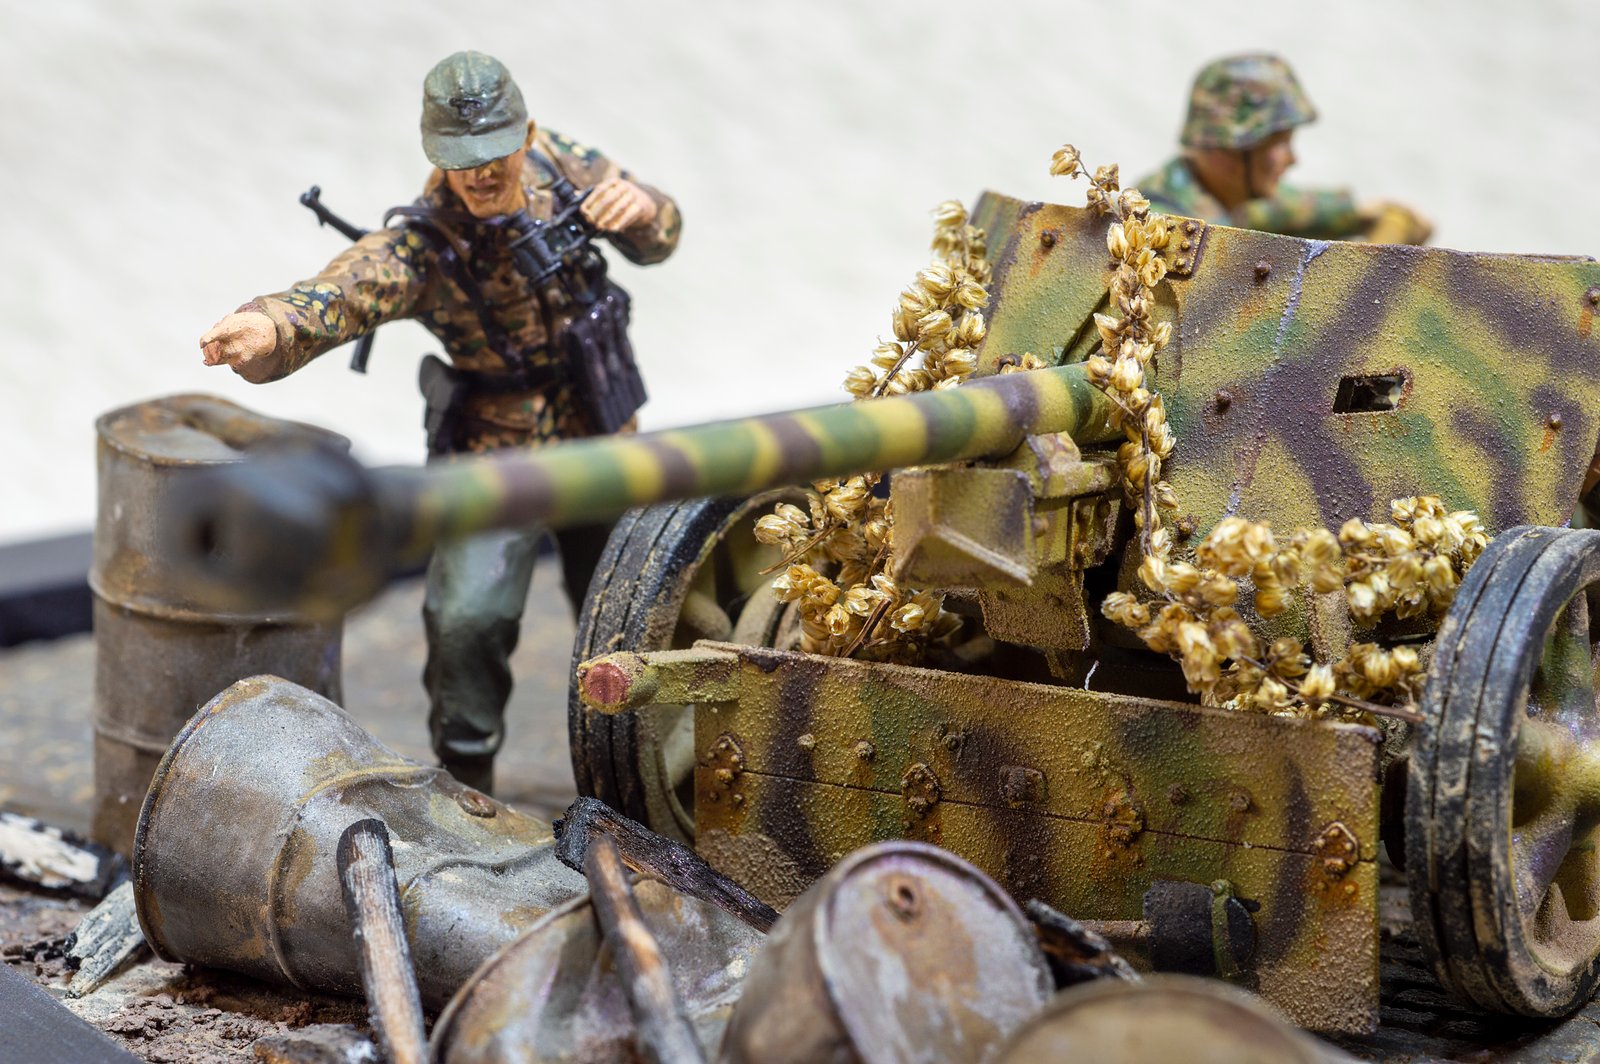
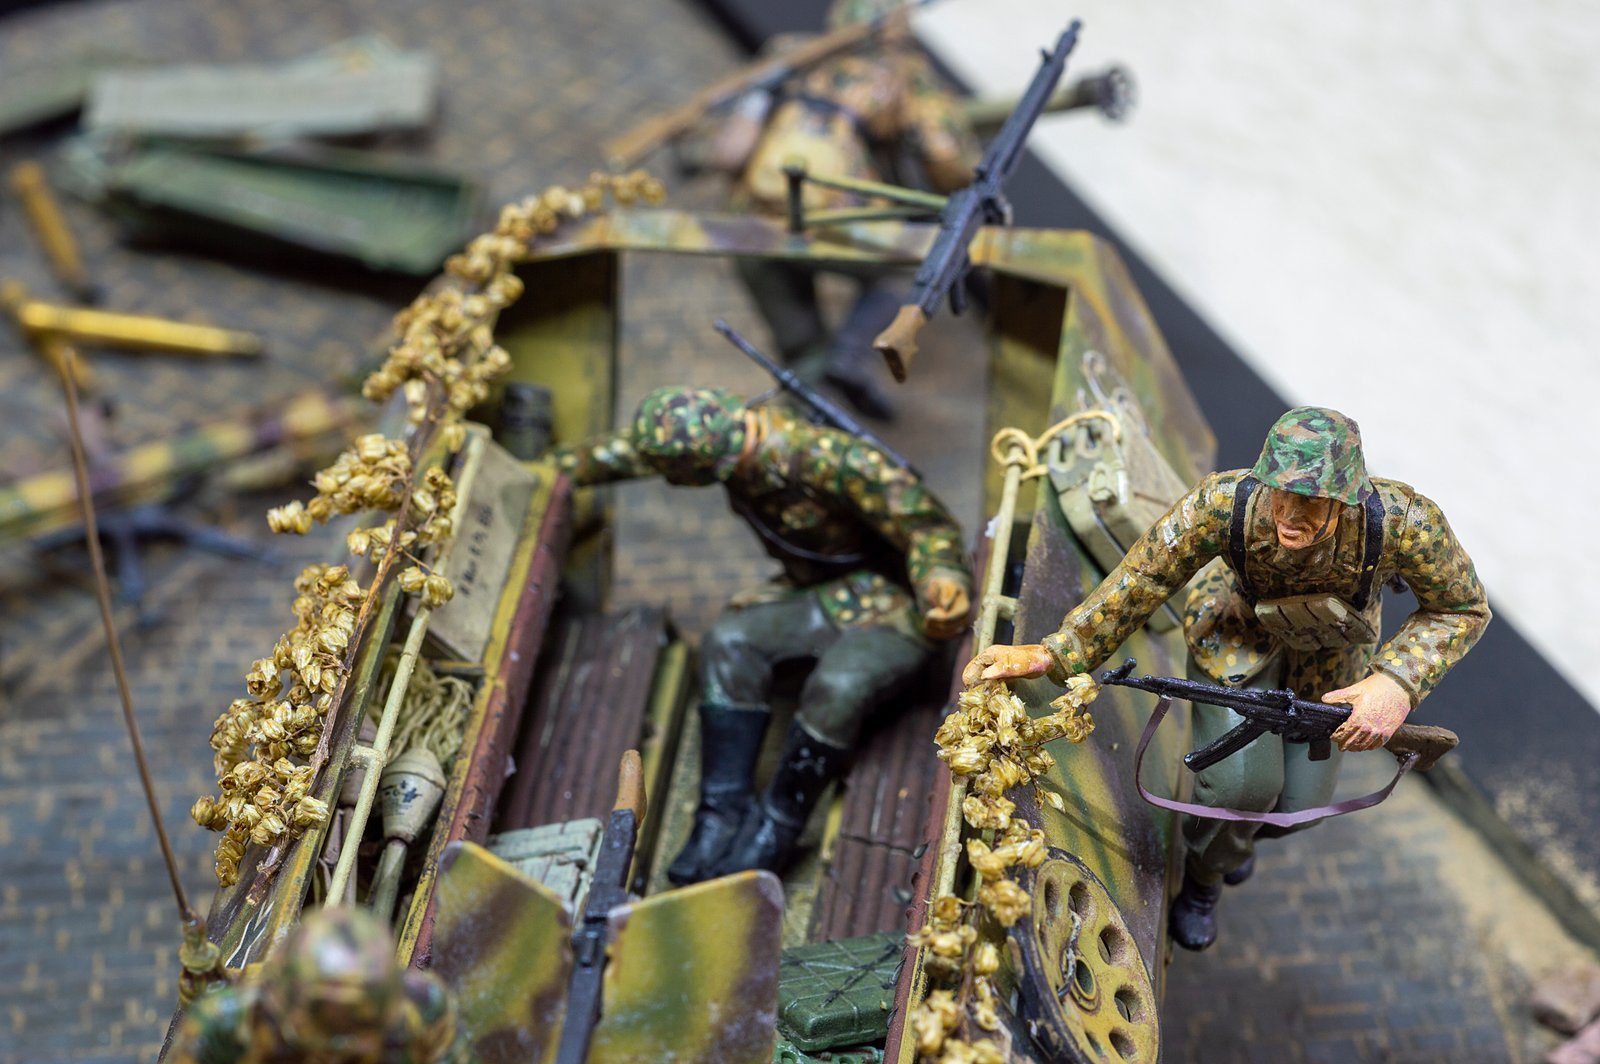
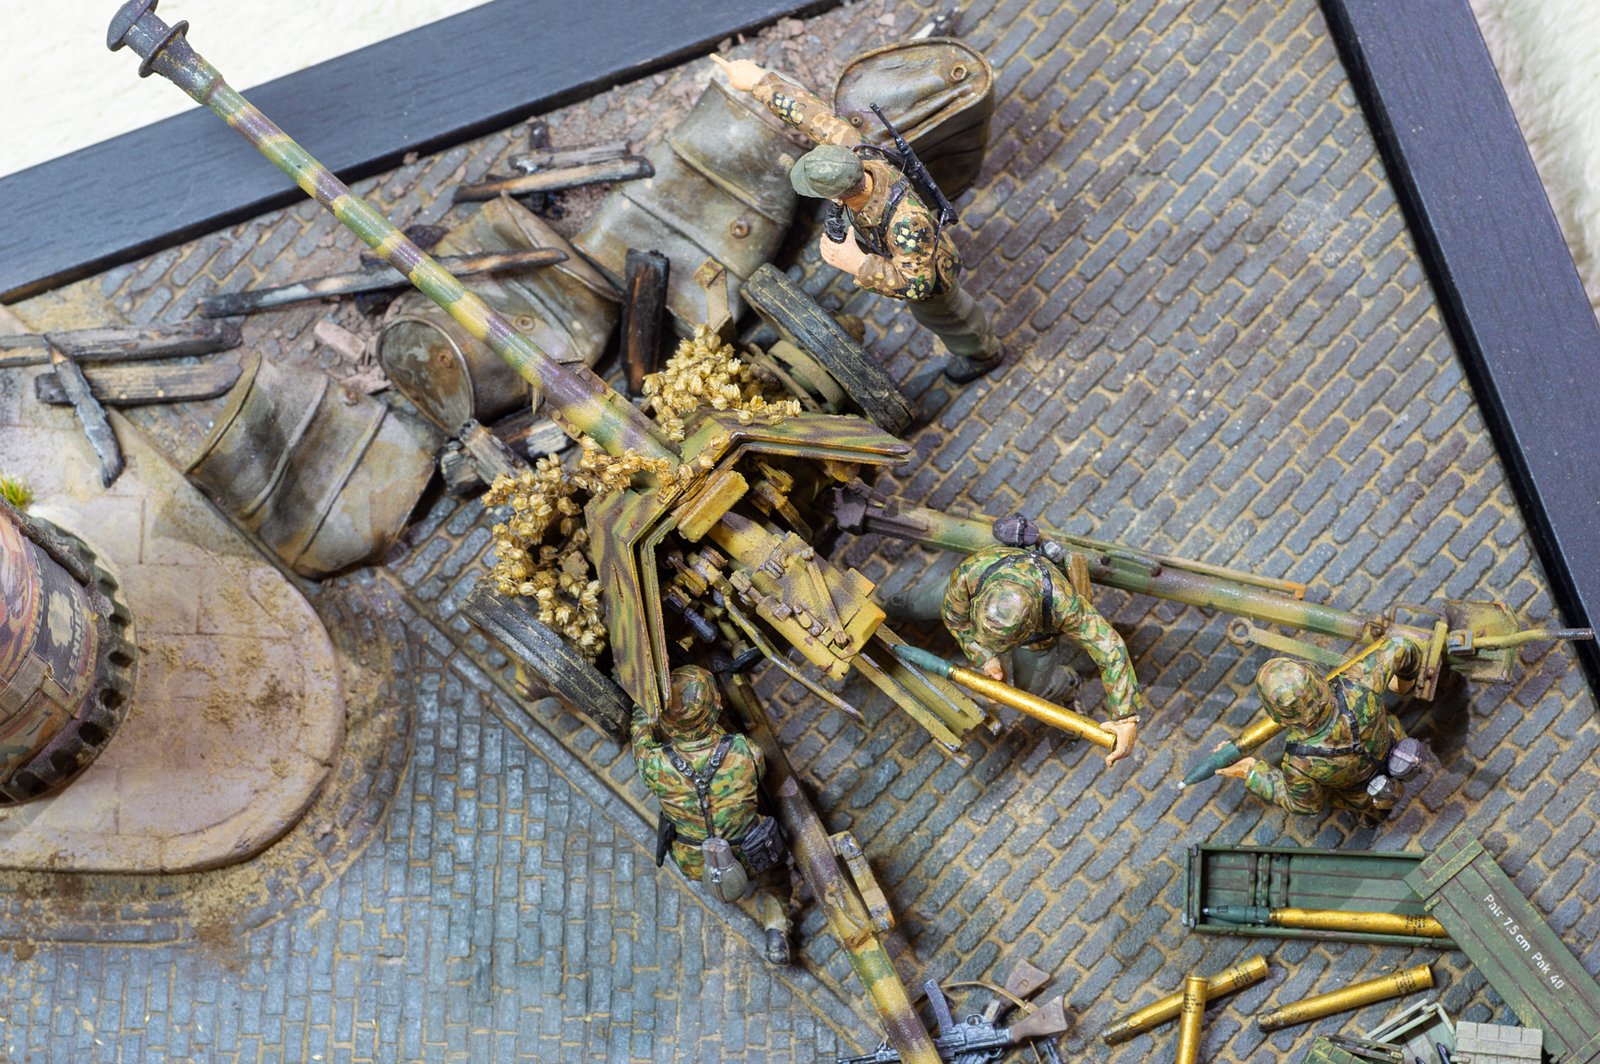
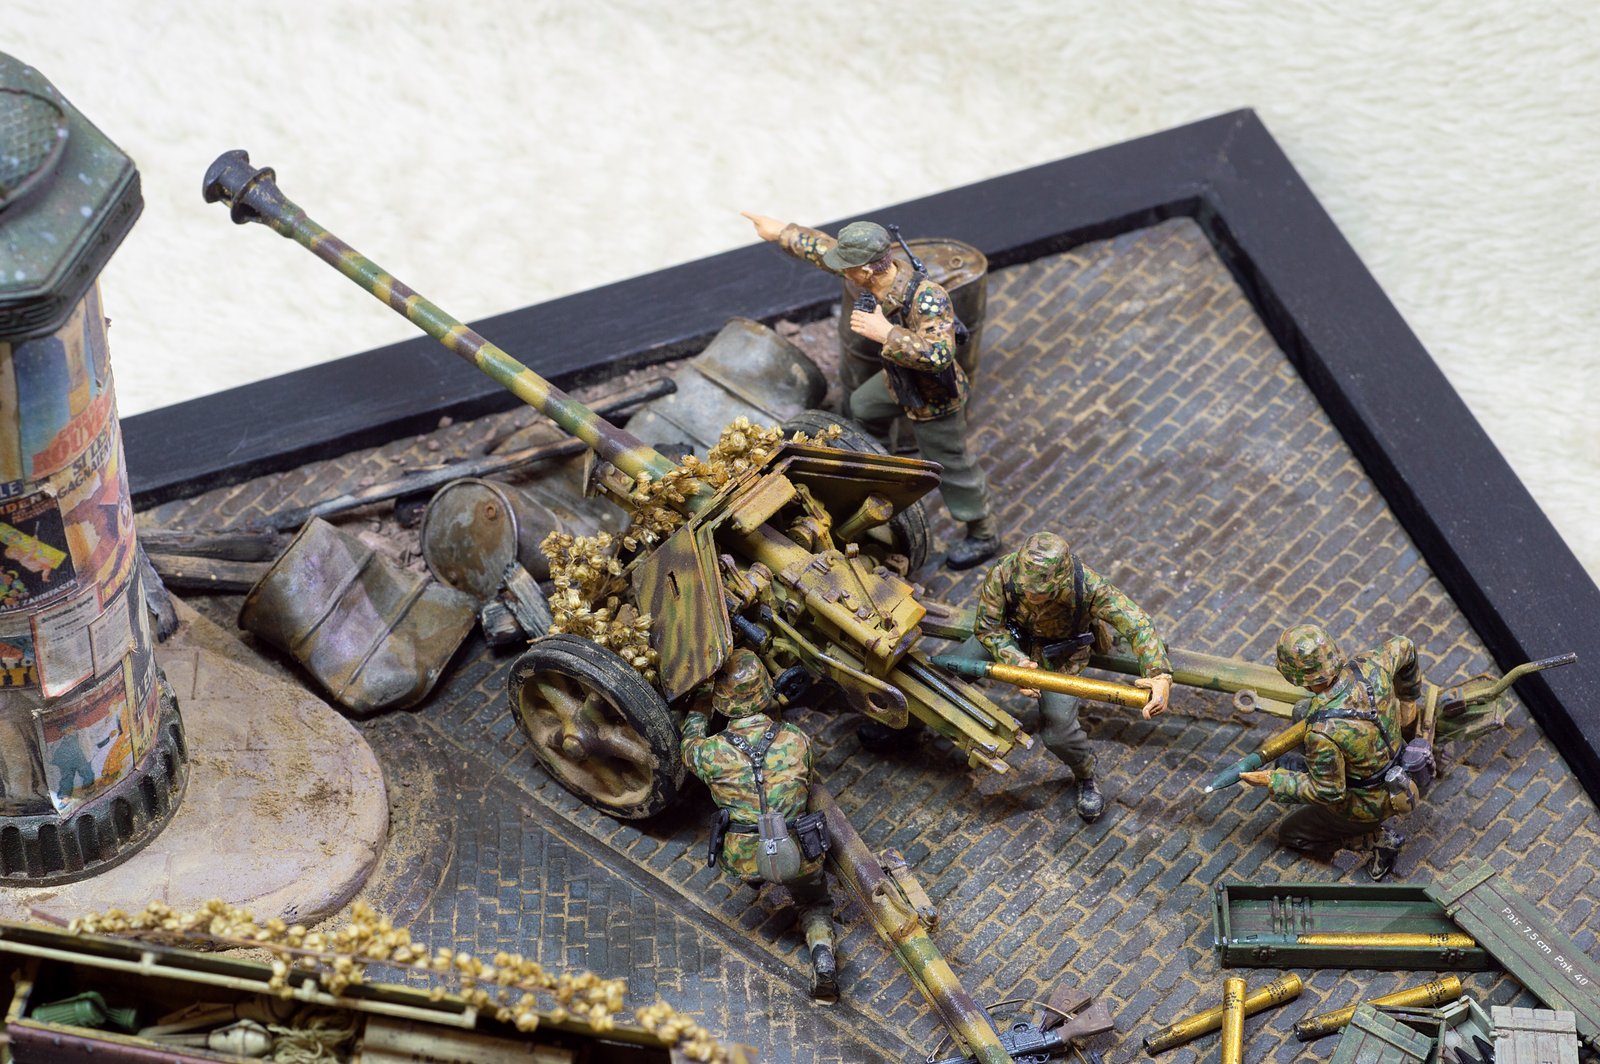
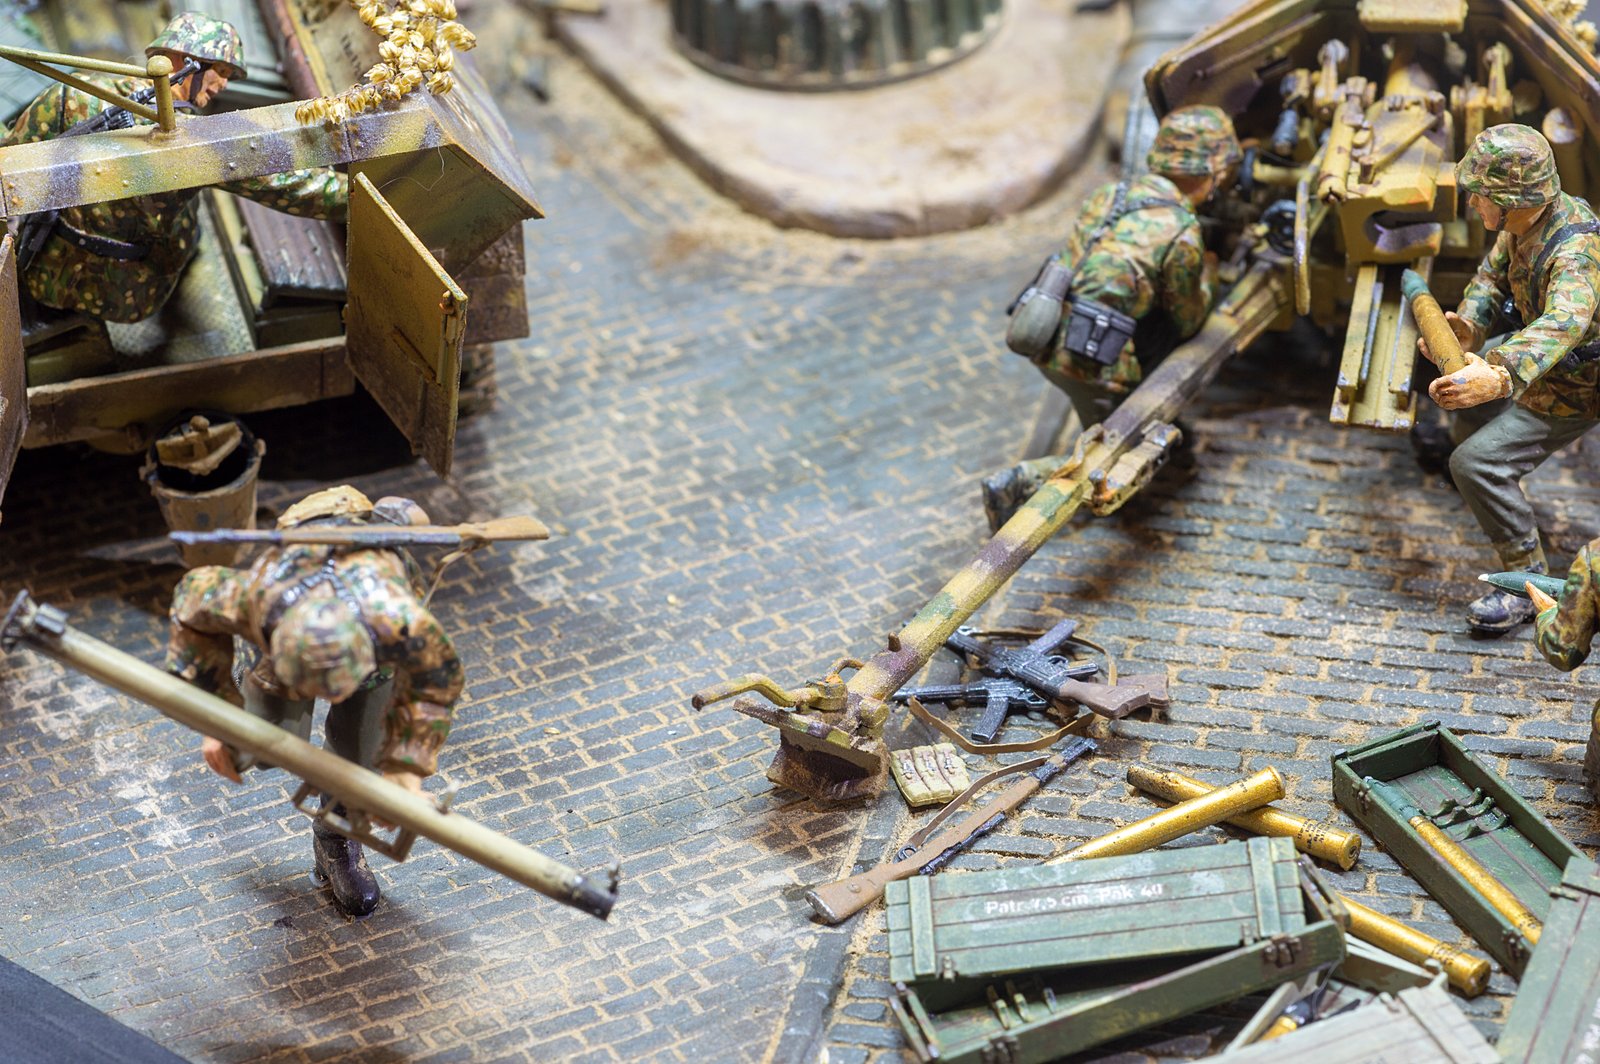
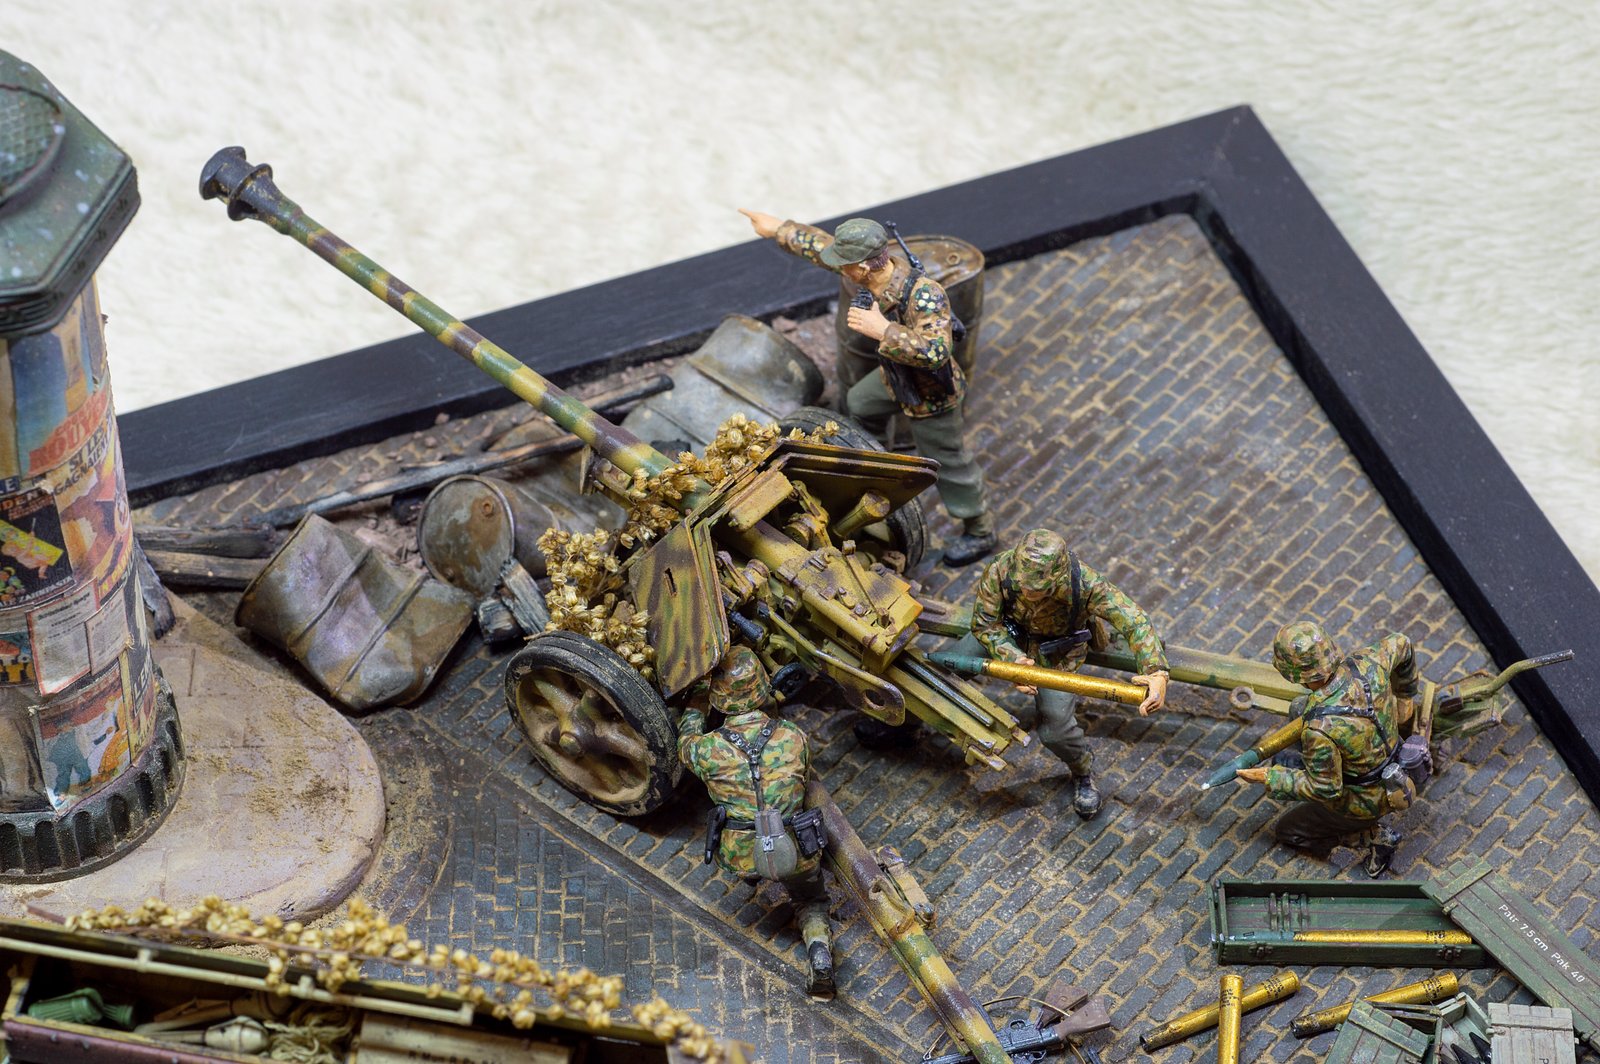
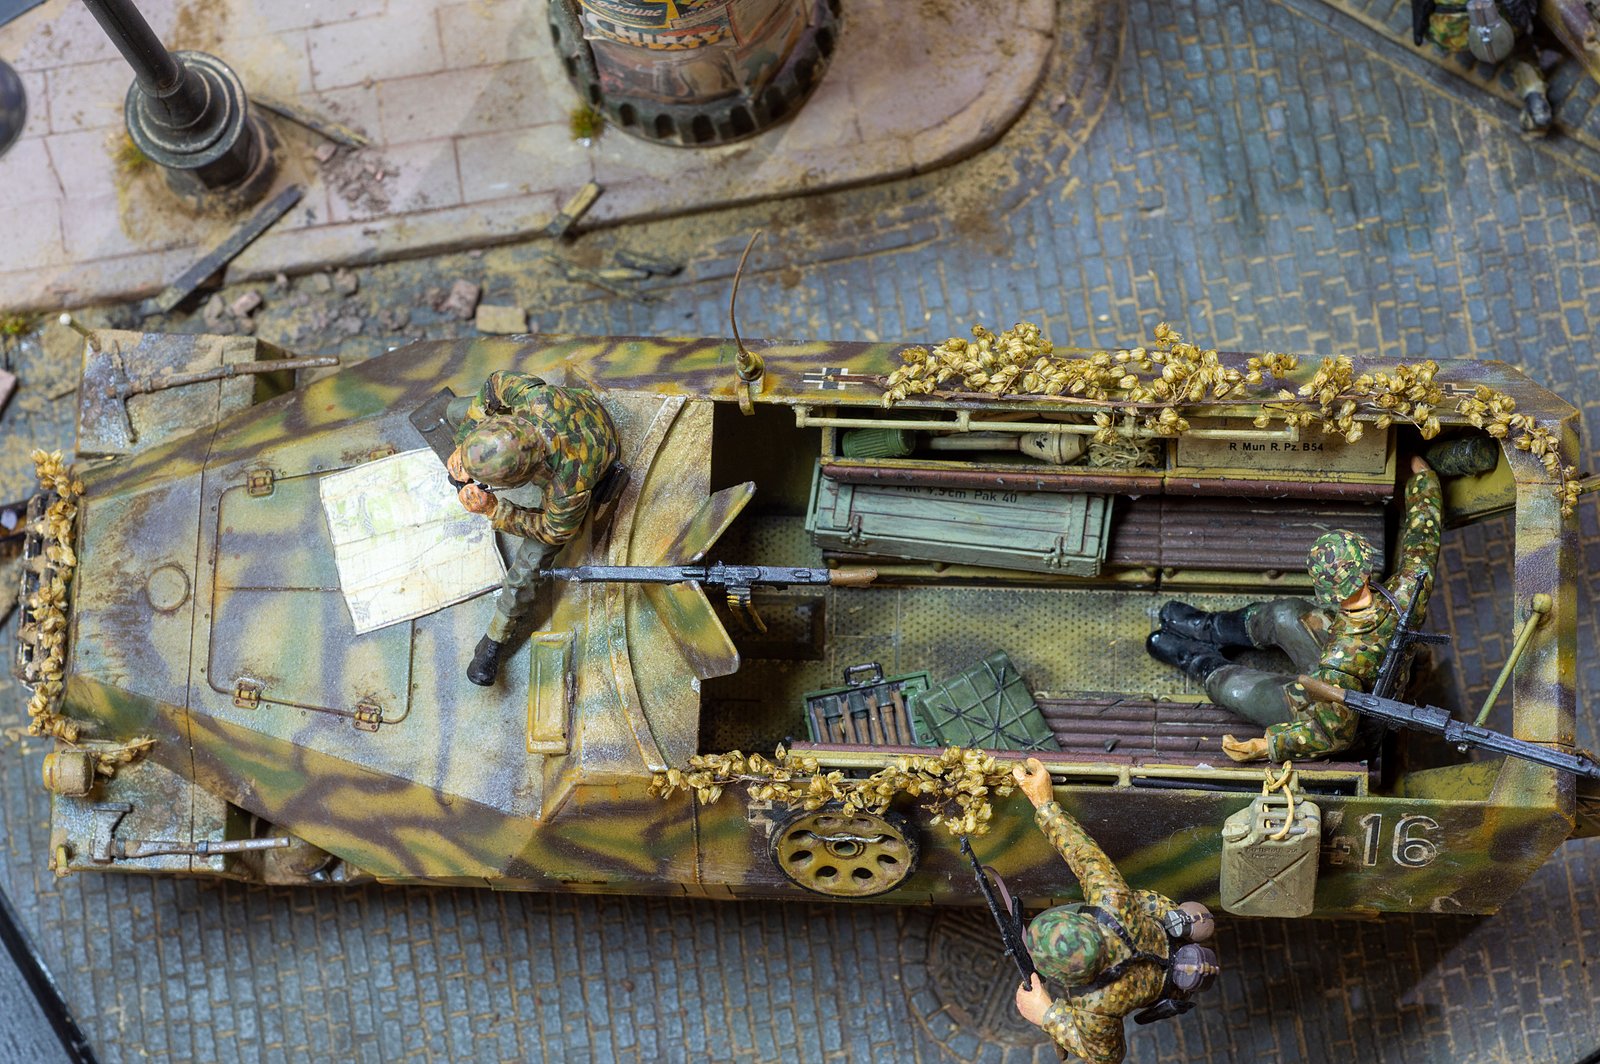
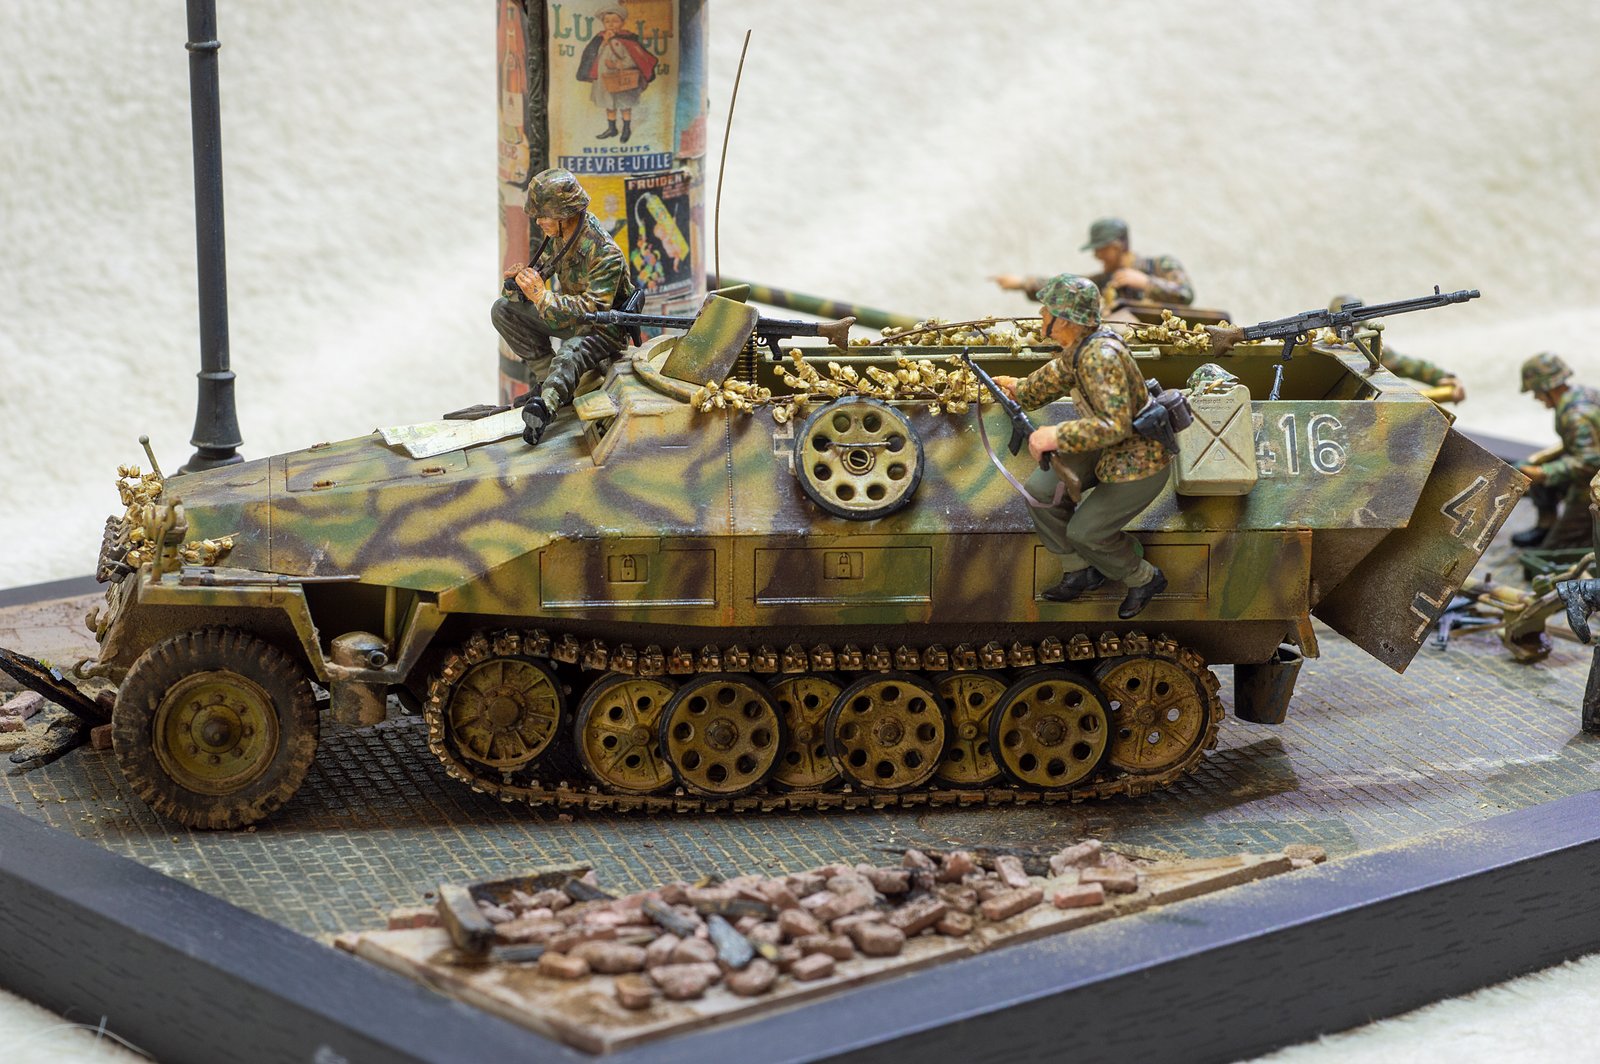
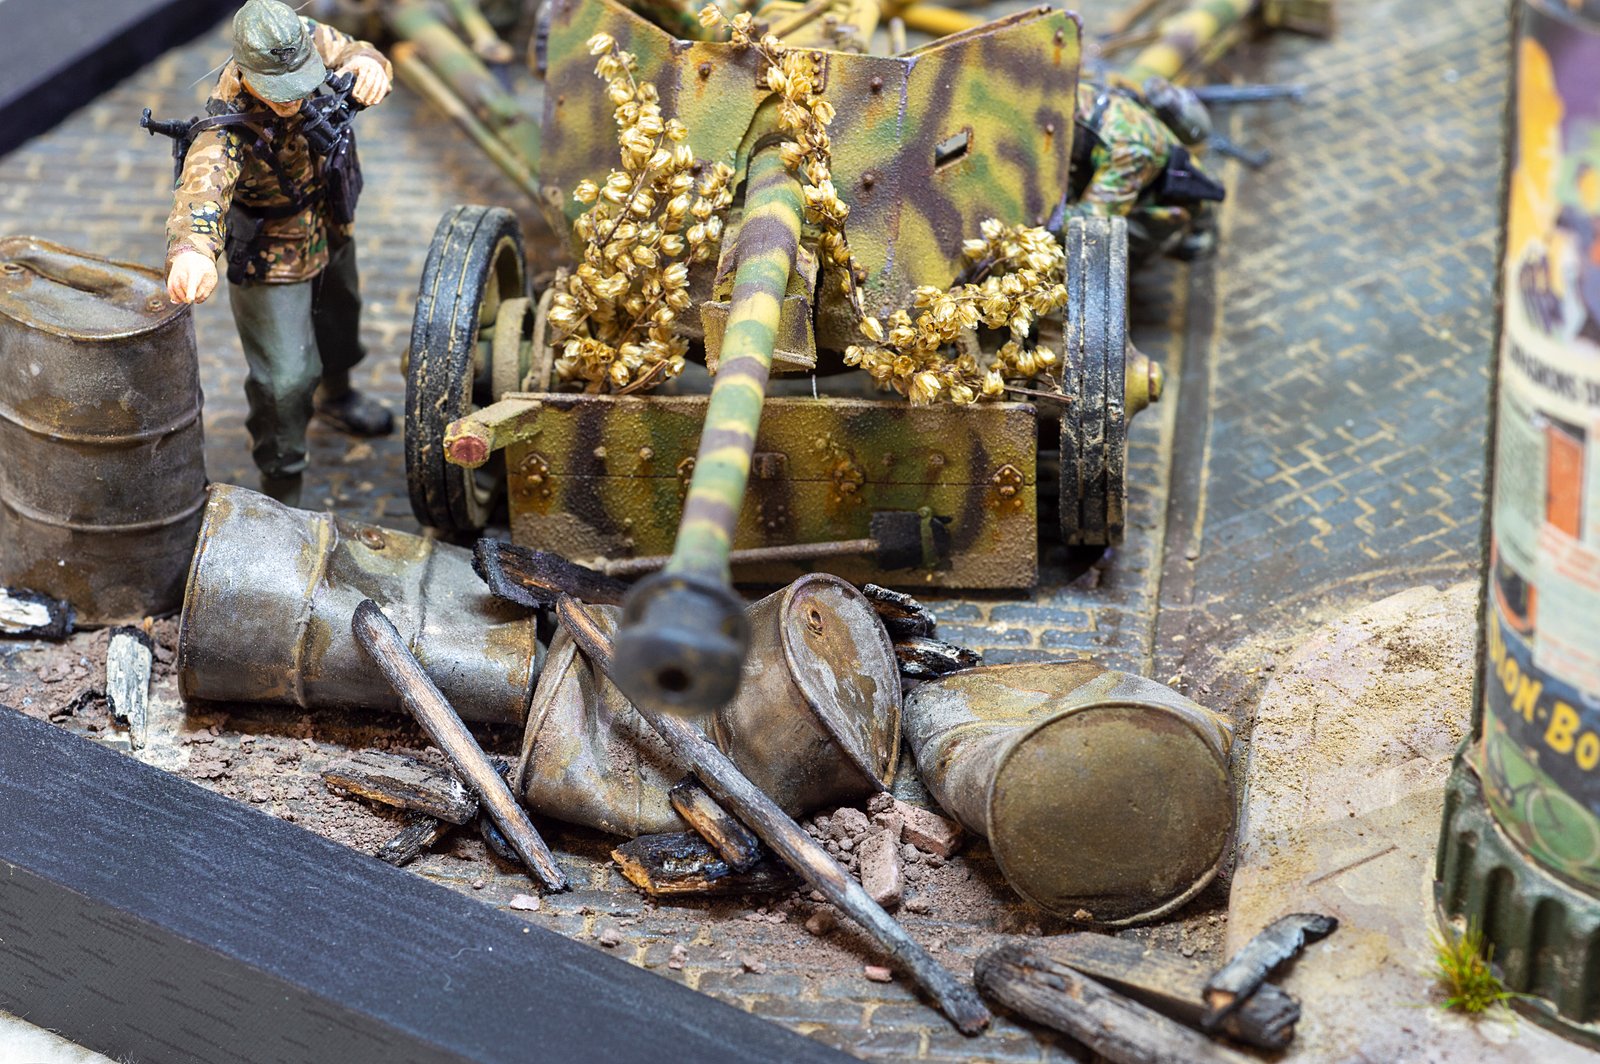
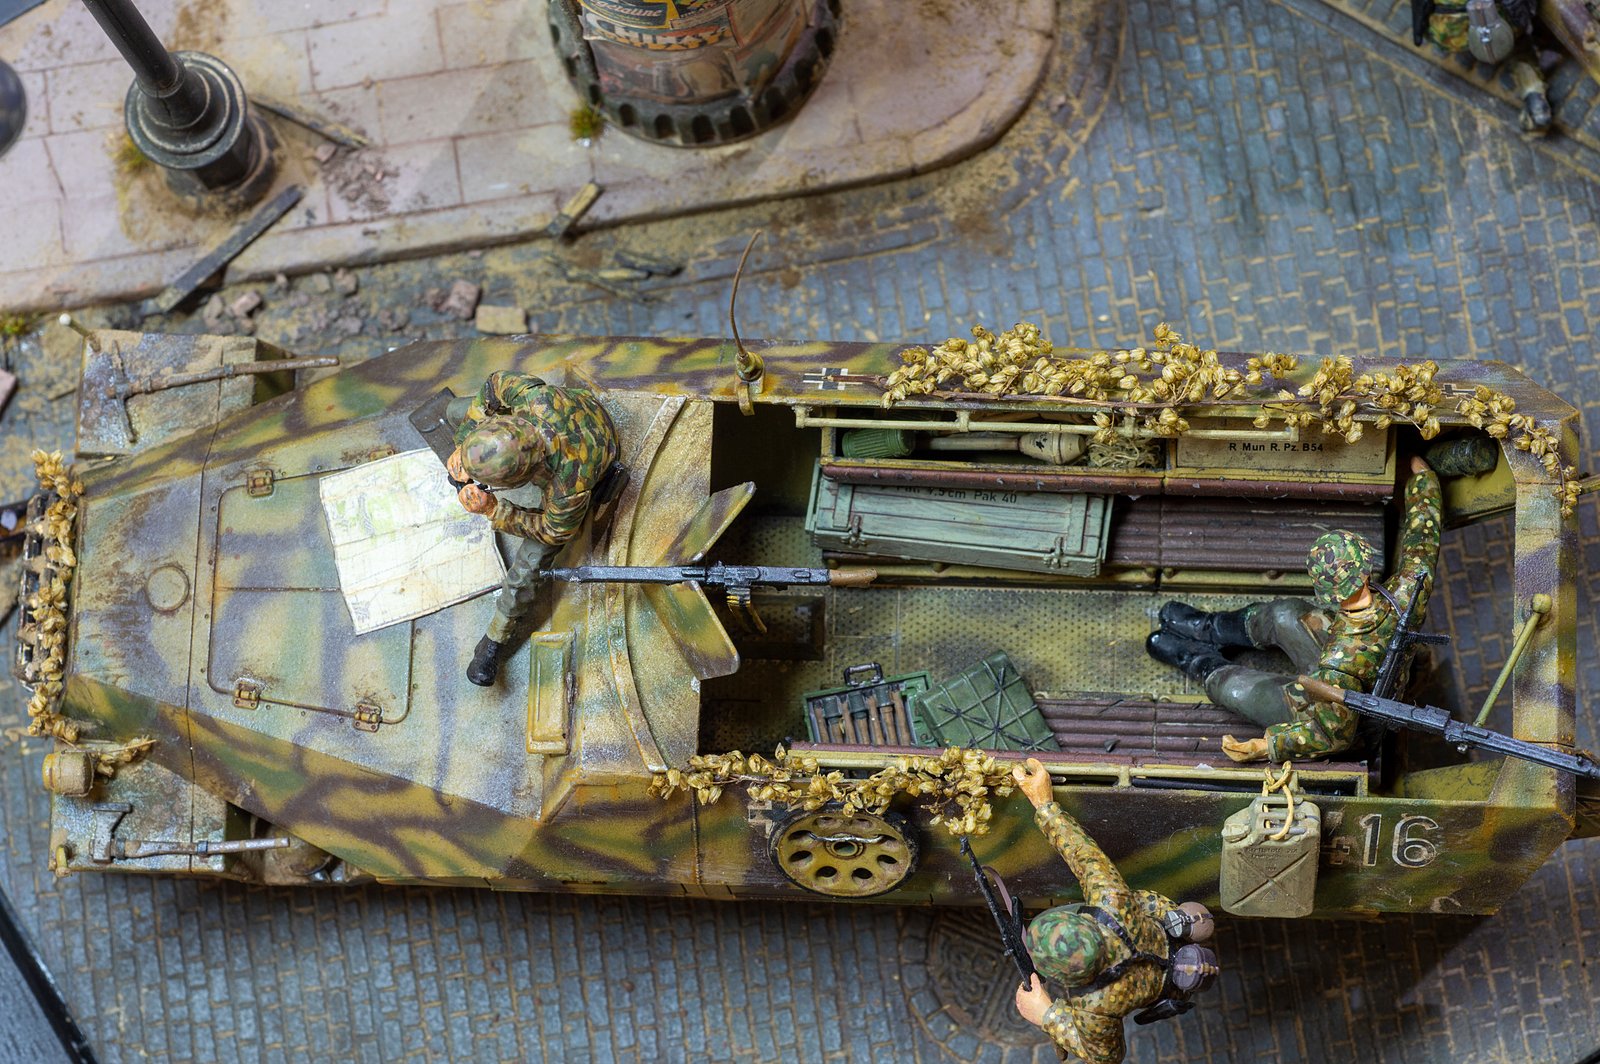
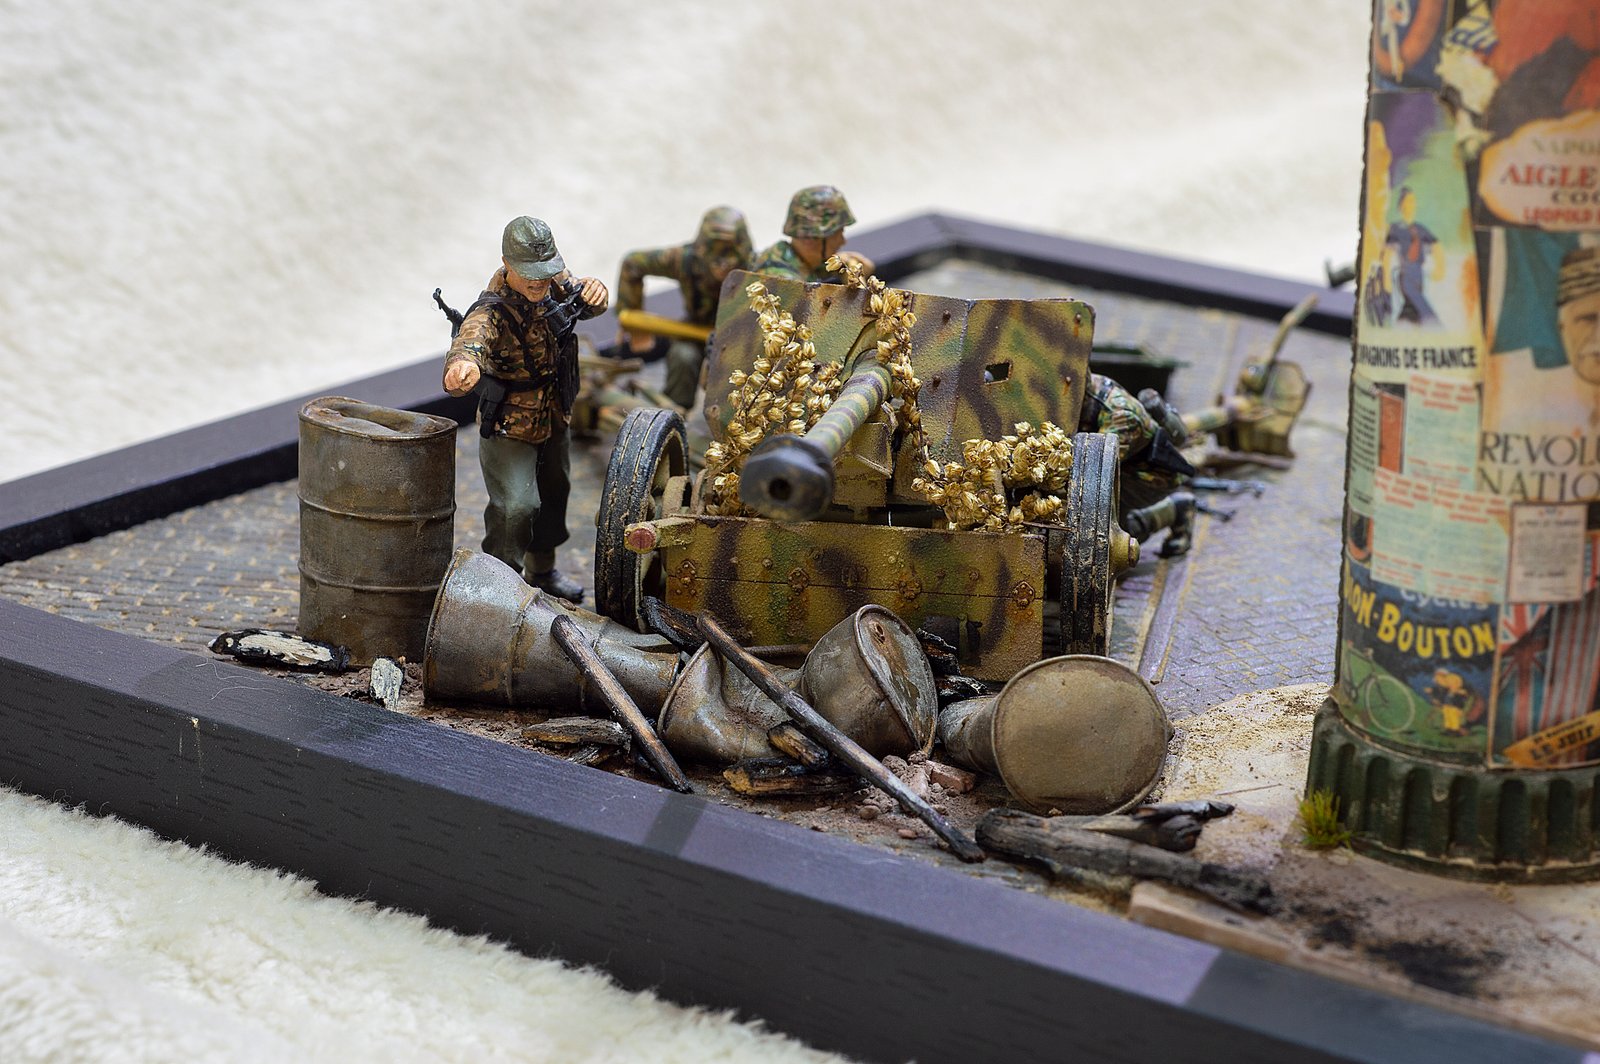
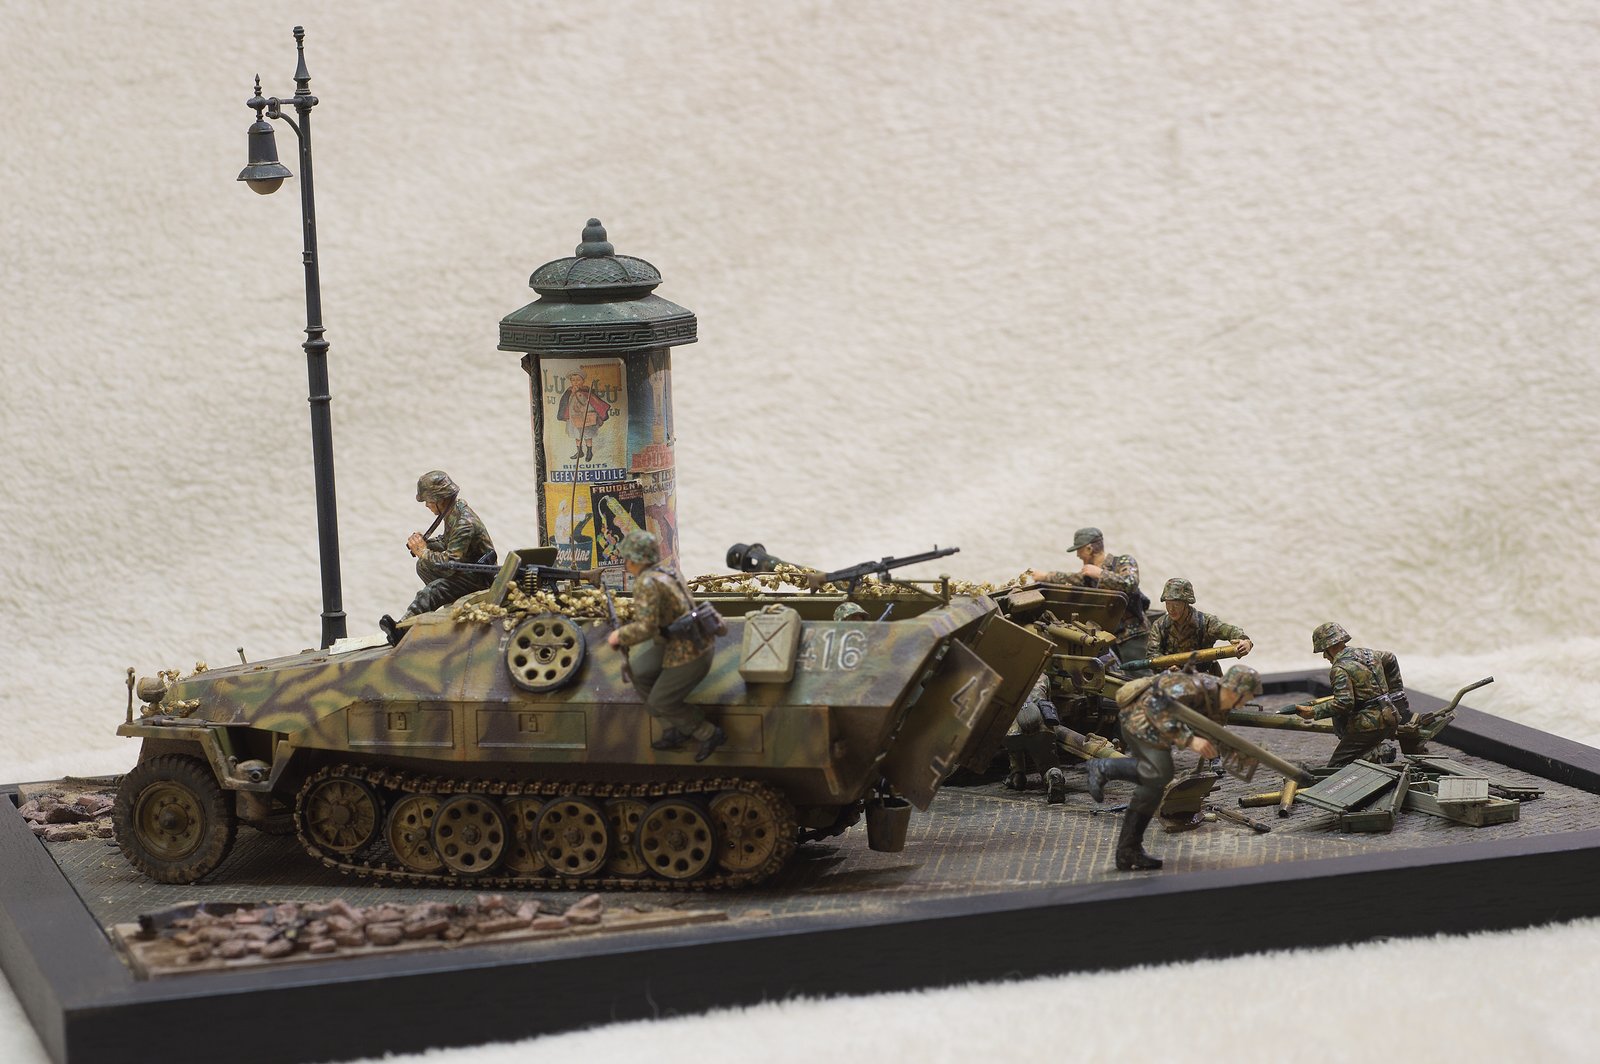
12. SS Panzer Division "Hitlerjugend" units. Anti-tank ambush at Falaise, near Caen, summer 1944. A PaK 40, partially camouflaged with street debris, is in a defensive position, its shield partially covered by branches, barrels, wood, and bricks. Ammunition crates are prepared at the rear of the PaK 40. The SS crew is working hurriedly. An Sd.Kfz. 251/1 Ausf. D, tasked with towing it in retreat, is alongside, partially concealed by a Morris column, with the commander assessing his situation with a map, ready to escape off the pocket. The PaK 40's crew will be supported by the soldier armed with the Panzershreck, while the other soldier inside the Sdkfz 251/1 attempts to retrieve the ammunition crate to follow him.
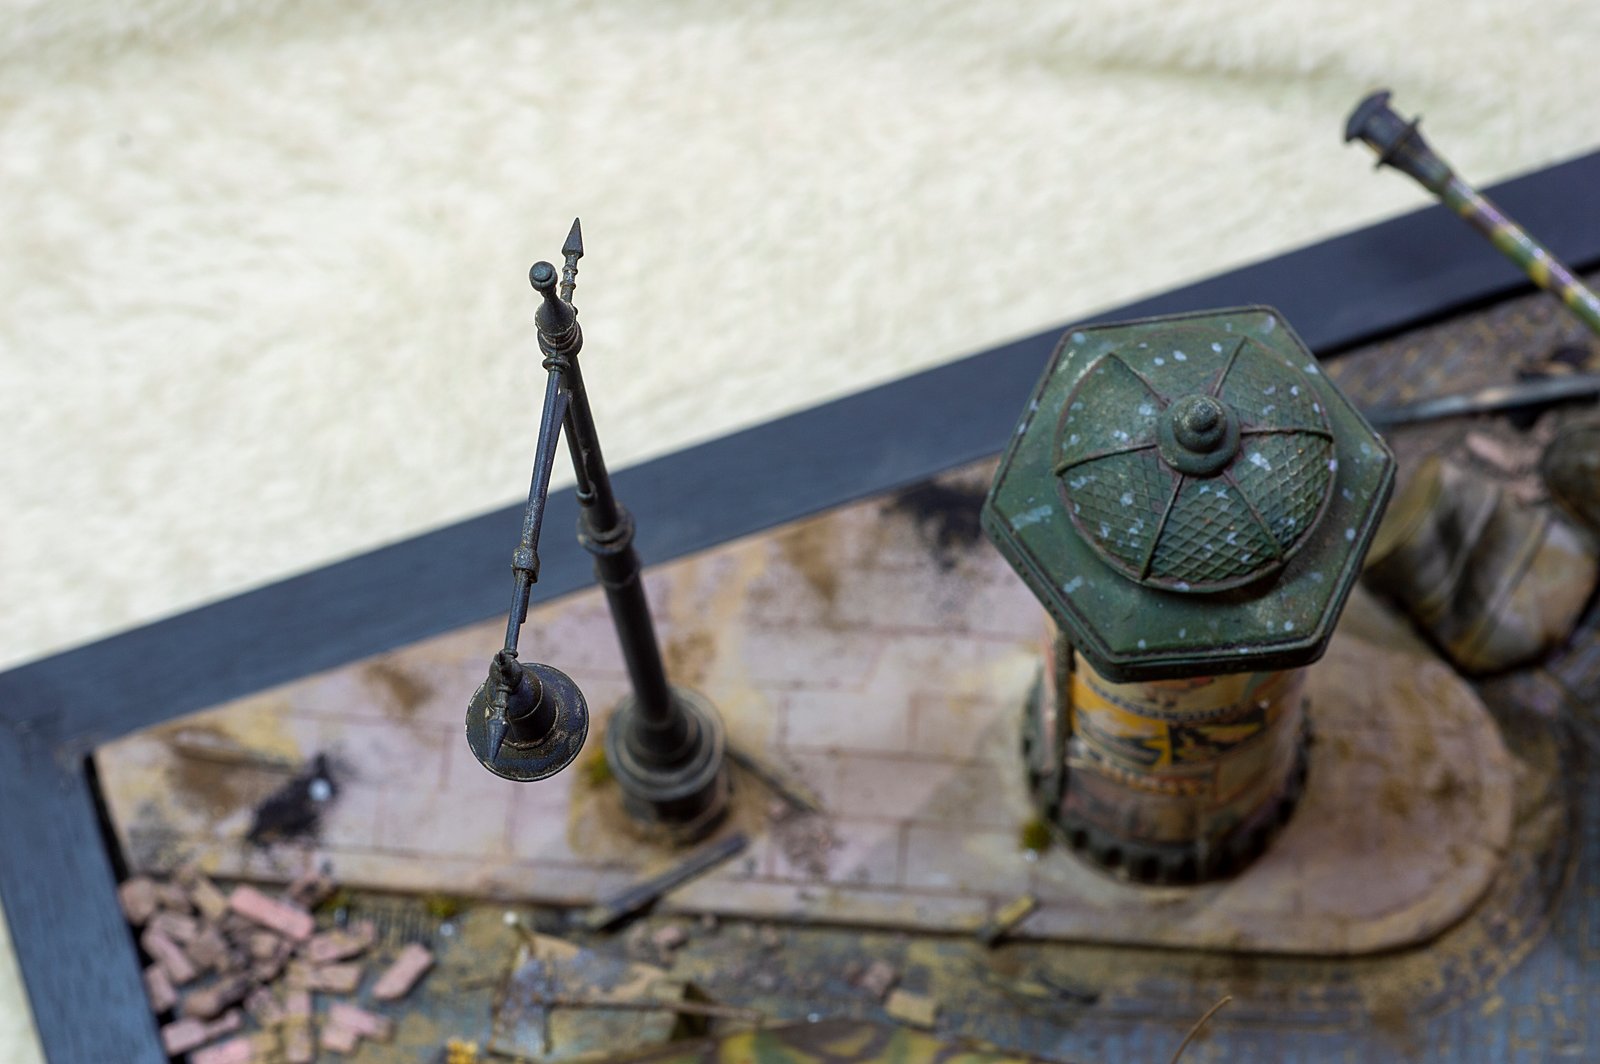
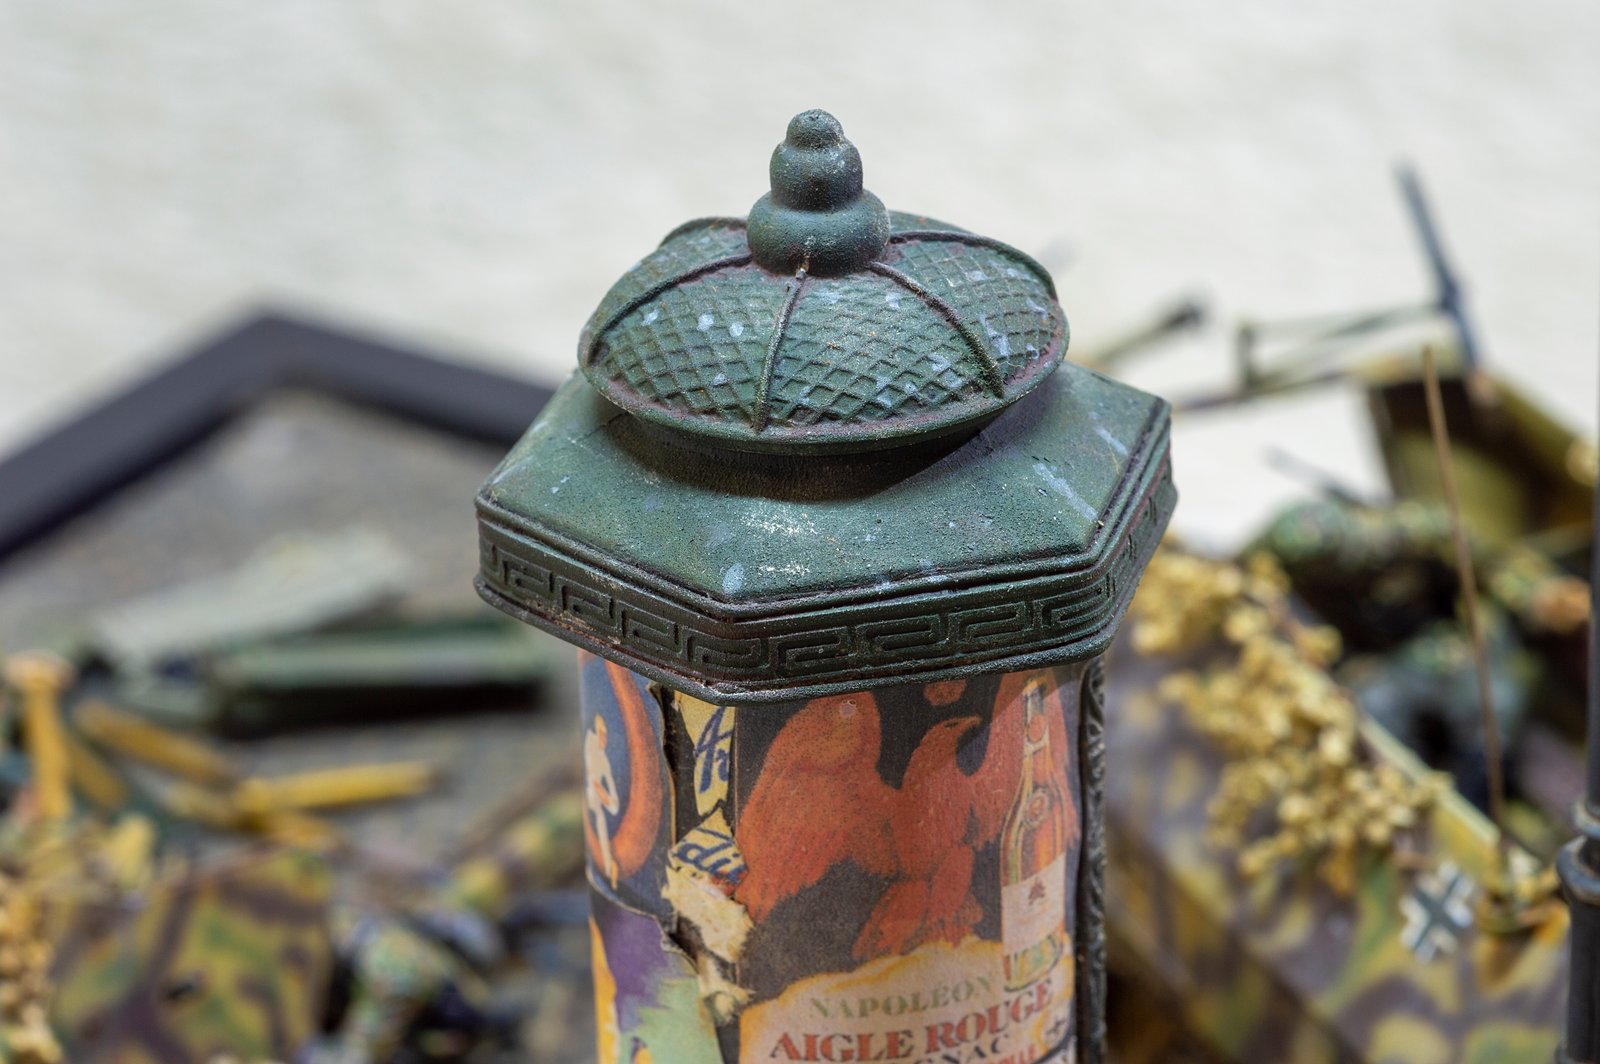
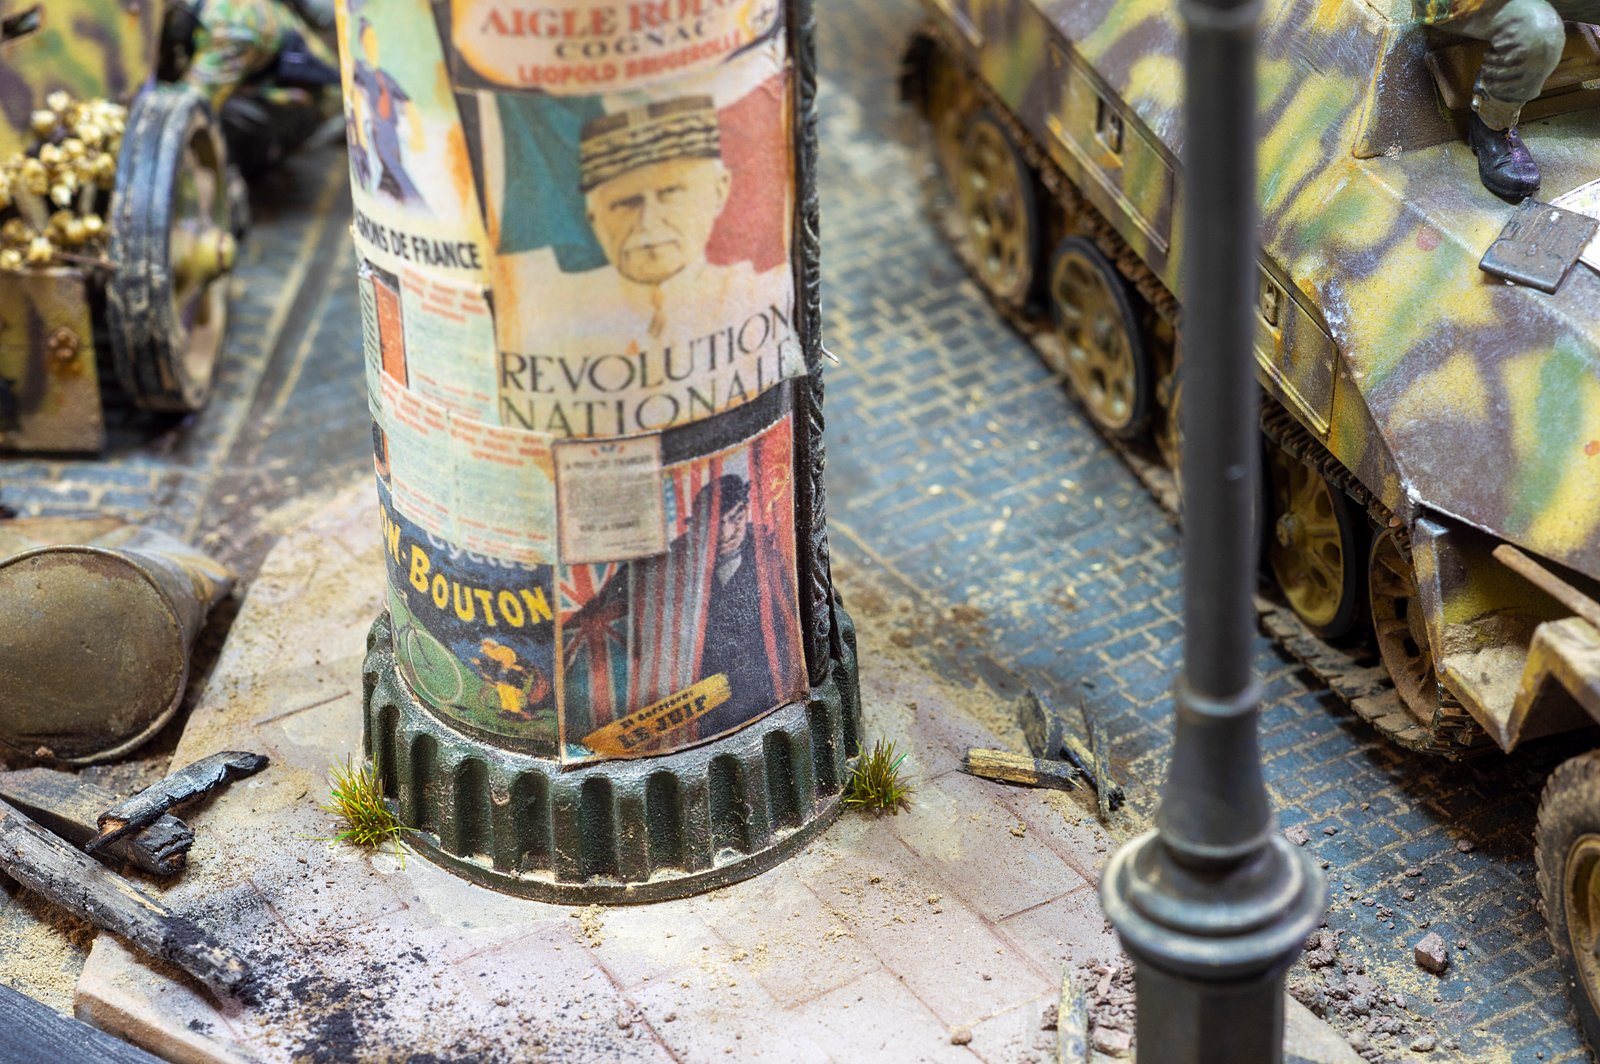
Returning to model making after 45 years is an "unusual" decision. One could start with something small, a single vehicle, a figure, something that gradually draws you back into the hobby. I chose the opposite: a diorama with two vehicles, seven figures, a period Colonne Morris, filled with posters, rubble, street furniture, and real grass as camouflage. A project that would force me to recover everything I had forgotten and learn what I couldn't learn back then.
I chose Falaise, August 1944, for several reasons that became intertwined during the construction process. The first is historical. The Falaise Pocket is one of the most dramatic moments of the Western Front campaign: an elite unit, the 12th SS Panzer Division "Hitlerjugend", resisting the Allied encirclement under desperate conditions after two months of continuous combat. Most of the soldiers in this division were between 17 and 19 years old. Their officers were veterans of the Eastern Front. It's a unit that combines youth, ideology, extreme discipline, and -sadly- documented acts of war crimes. It doesn't allow for an innocent view. And that's why I found it interesting to depict: because it forces you to think about what you're doing.
The second reason is technical. This type of scene, a PaK 40 in enfilade with its half-track providing close support, is a classic in military modeling. It allowed me to test almost everything I wanted to revive in a single project: airbrushing, complex camouflage, consistent weathering between parts, integrating figures with vehicles, urban scenery, and so on. It was ambitious but manageable, a fair challenge to get back into the hobby.
The third reason is Narrative. Falaise wasn't open countryside: it was a real, small French Normand town, complete with street furniture like the old classical street lamp, Vichy propaganda plastered on Morris columns, and rubble from houses already bombed. I wanted to tell all of that in 30x20 cm.
The scene isn't just military. It's a place where people used to live, where German soldiers are now fighting, and where the Canadian tanks are about to arrive. Pre-war advertising posters coexist with propaganda from the collaborationist regime. That contrast was what I wanted to show.
And the fourth reason is symbolic. Falaise is a moment of transition: the end of the German presence in France, the end of the illusion of the Western campaign, the end of almost everything for the units trapped in the pocket. Choosing a historical episode of "ending and transition" for my return-to-the-hobby diorama wasn't accidental, although I didn't consciously plan it at the beginning. I've come to understand it as I've built it.
I don't know if it's an important diorama. I know it's been a project that has forced me to think, to study and research, to make mistakes, and to try again. And now, seeing it finished, I'm glad I chose this moment and not an easier one.
Under construction.
Any project of this size teaches you valuable lessons. Some are technical and useful for future projects; others are process-related and have changed my approach to model making. I'm sharing them in case they're helpful to someone.
- Humidity is non-negotiable. I live on the Costa Brava, near the sea, with typical humidity levels between 60% and 80% in spring and summer. My first attempt using spray primer came out dusty (the classic "dry tip") and ruined the base of the street model. I had to wash the whole thing with detergent and start over. Since then, the dehumidifier has to bring the room below 50% humidity before I touch any lacquer, primer, or spray varnish. There are no shortcuts.
- Gloss varnish before enamels is also non-negotiable. Matte acrylics are microporous. An enamel applied directly over them can reactivate them, especially with thinner. I learned this by partially ruining one side of the PaK 40 and having to repaint it. Now the rule is: acrylic → gloss → enamel → gloss → acrylic. No exceptions.
- Delayed and unified weathering. At first, I tried weathering each piece separately, thinking it would save time. The result was inconsistent: each vehicle had its own distinct "dust." The solution was to apply the final weathering (mud, dust, general pigments) simultaneously to the entire assembly in the diorama, using the same products and at the same time. Color consistency resolves itself.
- Model Air vs. Model Color airbrushing. Vallejo Model Air paints come pre-thinned for airbrushing and are much less tolerant of additional thinning than Vallejo Model Color paints. Excessive thinner in Model Air produces "spidering" (spider legs) almost immediately. The lesson: if it works well unthinned, don't thin it.
- Actual curing vs. surface drying. A hairdryer accelerates the drying of water, not the chemical curing of the paint. A primer can appear dry in 10 minutes and still not be bonded to the plastic. Applying a base coat on top before 24 hours of actual curing time is a surefire way to cause adhesion problems. There's no need to rush.
- The "less is more" rule applies to weathering. In the early days, I tended to overdo it: chipping everywhere, dust covering everything, rust on every edge. I learned to stop before I thought I was finished. Realistic weathering is in the specific details (door edges, contact points, seams), not in the overall coverage. A real vehicle doesn't have the same wear everywhere.
- Some dark predominance on the trousers of some figures. One of the PaK 40 servants ended up with excessively dark trousers, almost black. The regulation feldgrau was a medium greenish-gray, not so dull. It was the result of a wash that accumulated too much. It could be corrected with a light drybrush, but I haven't touched it because it's already fixed and the overall effect works.
- The projectiles are scattered too parallel. The empty ammunition crates with the shells on the ground tell the story of the battle. But some projectiles are aligned with each other, when in reality they should have fallen in random directions, some rolling, others hitting the crates. The composition looks a tad "orderly" for what should be a chaotic moment.
- Excessive uniformity of the rubble. The rubble in the corner is almost all red bricks and dark wood. A real collapse would also have limestone, white mortar, and remnants of plaster. Adding two or three light-colored stones would have provided more chromatic variety.
- The black primer on the rubble bricks. The broken bricks look a tad too dark in the shadows. A gray primer would have provided a better starting point for the reds. It's a lesson learned: the primer color affects the entire final result, not just adhesion.
- No diorama ever turns out exactly as you initially imagined. This one was no exception. But the process has brought back something important: patience. Starting a session knowing you won't finish anything visible today, and still working two hours preparing a layer, is a type of discipline I had forgotten. Returning to the hobby after 45 years has been, above all, about rediscovering this unhurried way of working. If there's one thing I've learned, it's that good model making is done slowly, with controlled humidity, with proper 24-hour curing times, and accepting that sometimes you have to redo things. And that sharing the result, successes and failures included, is part of the process.
Share your thoughts or a question. Comments are reviewed before publishing; if you leave your email, it will not be shown.